Thursday, September 29, 2011

Card Blessings


World Card-Making Day is on Saturday, October 1st, and I'm loving using my Cricut Expression2!  For this card I used the Flower Shoppe cartridge.  I cut a variety of leaves from white cardstock in sizes ranging from 1 1/2" to 2", and inked them while still on the Cricut mat.  I sprayed  a misting of Sunflower Gold Perfect Pearls, and crunched them up a bit after they were dry.   I cut one of the flowers from the same cart to use as the golden sun -- inked it and added a gem.  "Count Your Blessings" was cut from the Thanksgiving cartridge.  For the card base I inked on a bit of Stormy Sky & Walnut Stain Distress Inks, and finished it off with a velvet green ribbon.


TIP: Inking the leaves while on the mat was a good idea, and a time saver...but spraying them with the glimmer mist was not. It got them too wet to immediately move off the mat, and I didn't want to use my heat gun to dry them with the mat adhesive sitting just underneath them. Create & learn! =)

Happy Crafting -- Lisa

Tuesday, September 27, 2011

Cal Cards - Repurposing A Page A Day

The end of another calendar year is fast approaching, and almost time to think about buying, or even creating, another calendar for the new year.  Have you ever received, or given, those desk size calendars where you can flip a page a day at a time?  After the year is up, what do you do with them? 

I recently made a set of cards out of one of those types of calendars -- an old calendar I found at a Thrift Store called Grace for the Day, with quotes & scripture references, that each have a day on them but not the year.  One of the growing trends this year has been using papers that have the look, or have been, ripped out of a spiral bound book -- there are even punches to give you this type of look on your papers.  No kidding...


For this Cal Card set, I gently pulled the pages from the calendar that I wanted to use & trimmed to fit my mat (green cardstock 5 1/4" x 4").  The calendar pages already had a great look with the key & "staining", so I left them as is only adding some flower pieces, brads, & rhinestones (the flowers on the bottom cover the calendar day).  I attached the mat to Spice cardstock and the cards were complete.  How quick & easy was that?!

Inking the edges of the envelopes adds a nice touch for handmade cards.
With all the scrap papers we tend to accumulate it would be fairly easy to make a card a day (or even one a week) in a variety of colors & patterns.  These are great to send for any reason...or if just to say "I'm thinking of You".  They also make a great stationary set for gift giving -- just add envelopes & tie up with a bit of twine or ribbon.

Thanks for coming by, and have a lovely week!  Lisa

Saturday, September 24, 2011

Sketchbook Cards with Perfect Pearls

Nature's Sketchbook notecards

Yep, I'm still digging through my wood-mounted stamps -- I was never sure how to tackle this set of Nature Sketchbook stamps (by Stampin Up), but since I've been playing with the effects of water lately, I thought I'd continue the theme with Perfect Pearls. 

If you've never used Perfect Pearls before, they are a great addition to your scrapbooking/cardmaking.  Perfect Pearls (PPrls) are pigment powders of a variety of colors that have a glimmery effect.  They come with a resin binder already built into the formula so that when water is added they become permanent to the surface.  There are a variety of ways to use PPrls such as:  added to a Mini Mister with water to create a pearlized mist effect -- as in the tag I created HERE, and card HERE;  or in conjunction with stamping & misting as I did for the Bookplate Bookmarks I created HERE; or my Family Time tag I created which includes stamping & "painting", and can be seen HERE.  A lot of different uses & effects which I love. 

For these cards I first stamped the images onto cardstock with a black Archival ink (permanent ink).  Working on a non-stick craft sheet (or you could use wax paper) I spritzed a small area with water; then dipping a small paint brush in the jar of PPrls I pick up just a bit and swirl it in with a bead or two of the water droplets on my craft sheet until it's the color & sheen I'm looking for.  Then simply "paint" the parts of the image in the PPrls color of your choosing. 

I used my scoreboard to score a frame 1/4" in from the edges of the stamped cardstock (CS).  Then I used a light green CS to mat each of the images to give some continuity to the notecards.  I added a final mat in the colors represented on each card before adhering to the notecard.  Simple cards, but with the extra flair of a glittery sheen when tilted back & forth.  If you click on each of the photos you'll see the effect much better.


For the touches of white in three of the cards, I used Picket Fence Distress Stain which I swiped onto my craft sheet and watered down so the white wasn't so intense -- then I painted it onto the cards.

So glad you came by today...have a wonderful weekend!  Lisa

Thursday, September 22, 2011

Watercolor Misting - Fabulous Fruit

I'm still digging through some of my wood-mounted rubber stamps and finding some I've never used before.  I thought this set from Stampin' Up (Sun-Ripened II) would make a nice set of notecards -- and since I've been playing around with watercoloring I thought I'd try another type of watercolor technique with them.

Watercolor Misting:
1.  Stamp images with Archival black ink onto cardstock (I like using watercolor paper), and then clean off stamps.

2. Using Distress Inks (because they react with water, and keep their true color), apply a variety of ink colors to stamp - starting from light and finishing with dark color inks. 
NOTE:  I apply my ink pads directly to the stamp and use a wet wipe to wipe off any areas the color has touched that I want to add a separate color.  This works best if you're only using a a couple colors of ink.  If you're using several colors, stamp each color individually (adding steps 3 & 4 for each color).

3. Using a Mini Mister (or one that sprays a fine mist), hold stamp level, inked rubber side up, and spray a mist of water over the inked stamp.  Be careful not to over wet the stamp.

4.  Using a stamp positioner (mine is the Stamp-a-ma-jig), stamp your misted image directly over the image originally stamped with the Archival ink (if you're unsure how much to mist, practice on a separate piece of scrap cardstock, before stamping on your project).  Let air dry, or use a heat gun to dry quicker & keep the ink from spreading too much (especially if you used extra water mists).

NOTE:  Splitcoast stampers has a tutorial that uses the Stamp-a-ma-jig similar to how I did, except they used it to show a shadow effect.  You can view that tutorial on YouTube ---> HERE

To finish my notecards I added coordinating fibers & paper, tearing the bottom & lightly inking edges; and added tags I punched (Paper Shaper tag punch) mounted with foam dots. 


With a paintbrush dipped in water, I moved the red ink over the
apple...I probably would've liked it better leaving it as it was.

Thanks for bearing with me while my computer was down.  I'm happy to say the new one is now up and running beautifully -- so back to creating I go!  Now maybe I can get to some of those other ideas I had to put on the back burner.  =)

Glad you could stop by!  Have a great day ~ Lisa

Thursday, September 15, 2011

Park Bench mostly Watercolor Card

I recently spent a bit of time watercoloring a few cards.  I quite enjoyed it, but while working on this card I decided to do a bit of experimenting.  In my last post I talked about the ease of watercoloring with Distress Inks.  On this card, I still used a variety of Distress Inks, but I also used a couple of dye-based inks, Copic Markers, AND...Picket Fence Distress Stain!  A couple unusual ingredients in watercoloring, I'm sure, but I wanted to try something a bit different -- I did...and it worked (at least I think so). 

I watercolored the card as I described in my Forget Me Not watercolor post, but I was very curious as to what would happen if I used the Picket Fence Distress Stain to add a touch of white wash.  The stains have a dabber top and you can just literally swipe over the area you are wanting to color.  I really wish I had a before and after picture to show you, but I can tell you the colors became a bit softer after using the stain.  Scrap Time has a great video featuring Tim Holtz on how the Picket Fence (PF) stain reacts with other colors that may help give you an overall picture of what this fabulous stain can do.

After I used the PF stain the first time, I really liked it and decided to add one more coat of the white wash -- which turned out to be a bit too much for the brown park bench.  Sooo, I pulled out my Copic Markers (alcohol ink) and add a bit more color to the bench which really helped.  The hat & daffodil flowers I watercolored with dye-based inks, because I didn't have the yellows I wanted in the Distress Inks.  My final coloring was with the Copic Spica markers -- these markers have a fine mica glitter in them that just give the card a bit of shimmer when tilted back & forth.  I used the Spica markers on the hat, daffodils, & blue bird.

If you click on this photo you can really see the Spica mica!

To complete the card I pleated the ribbon by folding it in half, adding a staple, and folding the ribbon back over the staple...repeating three times.  The last pleat is held down by a glue dot and adhered to the back of the mat.  I don't know who the stamp was made by, as I've had it around for quite a while...and it's a bit embarrassing to say I've not even used it until now.  =) 

You might really enjoy giving watercoloring a try too.  And don't worry about being precise, as I think it gives it just a bit of an artistic flair -- that and the fact I don't enjoy anything too tedious.  =)

Thanks for stopping in...hope you'll come visit my blog again soon!  Lisa

Wednesday, September 14, 2011

Giveaway at Yours Artfully!


Hi guys...just a quick post today before I return my PC for a new one...YEAH Me!! Took it in last night and it looks like it was an internal error rarely found.  One of the problems even the Geek Squad hadn't seen it before -- of course it would happen to me.  BUT...I'll be happy to have the problem eradicated completely!  Too bad I'll have to take an entire day to re-load again all the programs and such...but good news, is still good news!  =)

Now onto the GIVEAWAY!  Lin at Yours Artfully is hosting a giveaway for Pan Pastels which you can sign up for HERE until September 30th, 2011.  I haven't tried these yet but the samples on her blog are great, and of course it's always great to try new products and expand the creativity.  She explains more about Pan Pastels on her blog in another post ---> HERE

I also wanted to mention that I first saw this great giveaway over on friend Kathy's blog -- Inkin' It Up, which another great blog you should check out. 

Aren't Giveaways fun?  Best of luck!  Lisa

Tuesday, September 13, 2011

Watercoloring - Forget Me Not


Before I take my new computer in for a fix-it job...again, I thought I'd try to create a quick blog post.  I still have some organizational tutorials to post, but I've not been able to spend time on the computer long enough to finish them...so they'll be up and coming again when I get my pc back.  In the meantime...

I was sorting through some of my stamps the other day and decided to go through my wood-mounted stamps.  I rarely buy the wood mounted, just for lack of space, but I love the ones I currently have -- I just don't seem to spend much time using them.  For some of the more detailed stamps, the coloring methods can be a bit time consuming -- but this day I was in the mood for some watercoloring, and dug out some of my older stamps.  One of my favorite stamps, that I rarely use, is my "Forget Me Not Bouquet" stamp by All Night Media...which some of you may remember is also my all time favorite flower. 

Watercoloring with Distress Inks is actually a fairly simple technique (even for those with no formal training...such as myself):

1. You can watercolor on regular cardstock & use a heat gun to dry between colors, but for this project I used watercolor paper.  You'll want to begin by stamping your image with a waterproof, permanent ink directly to the paper -- I like to use Archival Inks by Ranger which now come in a variety of colors.

2.  Using a non-stick craft mat to protect your work surface, swipe the inkpad colors directly to the mat so they aren't touching each other.  Then spray a mist of water directly onto the mat, NEXT to the already swiped ink.  By not adding water directly to the ink you'll be able to control the intensity of color.  It's best to only work with one color group at a time.  For instance, I started with the green leaves by swiping Sage & Pine Tree colors on my craft mat. 

3.  Dipping a small paint brush into the wet ink, swirl the brush into a small bit of the water, combining ink & water until the depth of color is what you're looking for.  Then paint directly over the already stamped image, according to your color scheme.  It's usually best to start with the lighter colors first, then strategically add accents of the darker colors. 

4.  After each color grouping is completed, wipe off the mat with a paper towel or soft cloth.  The Distress Colors I used for my card are:  Bundled Sage & Pine Needles (leaves), Stormy Sky & Tumbled Glass (flowers), Spun Sugar & Victorian Rose (rose, stamp, & sleeve), Tattered Rose & Tea Dye (envelope), Tattered Rose (hand). 

After I looked at this closer I realized I missed one small corner
of the envelope, which I'll be correcting.  =)

To finish my card I matted it with blue cardstock.  I used a foam applicator to dry sponge Stormy Sky around the blue mat...then, without wiping off my craft mat, I turned over the card with the watercolor paper already attached and rubbed it around my craft mat to pick up just a bit of the Stormy Sky I had left on the mat from the foam applicator.  I just thought it added a bit to the vintagey look of the paper.  Tied a bit of ribbon around the mat, curled up one corner of the watercolor paper, then adhered the mat to a lighter shade of blue to complete the notecard. 

I had enough fun watercoloring this card, that I decided to do another -- which I'll plan to post Thursday. 

Thanks for bearing with me while I fight with my computer.  Wish me luck!  =)  Lisa

Saturday, September 3, 2011

Sharing Saturday - Moments


It's one of those things no one can seem to explain.  The computer breaks down, gets replaced, the replacement works fine a day or two, the replacement won't turn on, the replacement goes back to be fixed, but they can't find anything wrong as it works every time they turn it on.  The replacement comes back home, doesn't turn on...again.  The hubby replaces the cord, the replacement works once again.  A day later, it won't turn on again.  Arrrghhhh!!!  Anyway, my hubby got it working for now -- which is why I thought it to be a good time to pop in on my blog, before figuring this PC out ... again.   

With Cody's school starting later than usual this year, we were recently able to have family visit for a bit, and then take a couple side trips ourselves.  This week we got to spend a bit of time in St. Charles, MO.  I've been wanting to check it out for a couple years now, since moving to Illinois, but this just seemed to be the perfect time to go -- aside from the stifling heat.  Anyway, I thought I'd share some photos my "photographer" husband took while we were there.  You can check out more of his work at CUSmile Production.  It's amazing how a great photo can give you a completely new experience of those moments you previously thought were only temporary.


Did I mention it's our Anniversary today?!
I'm blowing kisses & best wishes to my husband & best friend -- I love you!

Hopefully I'll be able to post a few of my projects in the next few days that I've been working on. 
Until then...Best wishes for a beautiful day!  Lisa

Saturday, August 20, 2011

Thinking of Grandma


Three generations: Mom, G'ma, & I
I love my Grandma!  She is such a classy lady, and so much fun!  One of my favorite outings with her was going to see my favorite magician, David Copperfield.  He was walking through the audience looking for a volunteer and I was on the end of the aisle.  He slowed down before walking just past me -- G'ma and I were like school girls.  LOL...that was a while ago, but we had a good laugh about it.  In October, my G'ma, Mom, my sister Beth, and I are all going to Frankenmuth, MI and I am so excited!  It's an annual event for Mom & G'ma and I've only been able to go with them once, but I out shopped them at the time.  My guess is that they've both recouped enough for Beth & I to join them--should be fun.  hee hee.

Anyway, I thought I'd pop in with a card I made for my Grandmother.  I used Cricut's Mother's Day 2010 cart to cut out the frames & the phrase "Grandma" w/shadow from coordinating cardstock, by My Mind's Eye -- I used foam dots under Grandma to add dimension.  If you look closely you'll see the off white part of the frame is a perfect fit on the oval edge, but on the deco edge I took a pair of scissors and hand cut that edge to the thickness I was wanting it to be, to show more of the paisley effect.  I like it wonky & a bit off center, so I wasn't too careful with my precision -- adds to the homemade effect.  =)  I added some inking to the edges of the card, and finished it off with a few rhinestones.

My other grandparents have already passed on, but I'm so glad I still have this time with my Grandma -- I hope I never take that time for granted. 

I hope you're enjoying time with your loved ones today.
Blessings, Lisa

Tuesday, August 16, 2011

SNT Tuesday - Organized Embellies

Hello blogger friends!  As I'm enjoying my cuppa Typhoo English tea, I'm thinking about the day ahead and all the fun projects I'm working on.  My young nephew's book is first on my agenda to finish -- and I'm hoping to do a YouTube demo showing his interactive book once completed.  That's about all I can say on that for now...but keep checking in, I'm hoping to have it posted by next week (fingers crossed)!

The handles fold down flat for optimizing storage space.
For now I have a great tip about how I organize my small embellishments & embossing powders which makes them also easy to transport.  It's one of the few organizing products I own that it's rare to find a sale on.  But I've not found anything else to compare to their  value, as yet.  Whenever I open one of them up at a crop I get lots of Ooo's & Ahhh's over the vast number of embellishments that fit inside.  They are made by the Close To My Heart (CTMH) company, and are called "My Accents Organizer" ($17.95).  They are 2" in depth, measure 12" x 10", have a handle for easy carrying, and hold 60 clear "Craft Jars" sold separately in sets of six ($3.50). 

UNFORTUNATELY, the organizers are no longer in their catalog for sale (the craft jars are still available).  I called my local rep to ask about it and she is putting out the word to some other consultants if they have any left to sell, or if they have any used ones at a reduced price for sale.  You can contact her directly on her website if you're interested, and she'll get back with you right away - Briana's CTMH website is ---> HERE

A couple other tips on finding these organizers would be to check out the Consultant Locator for reps in your local area to see if they are able to obtain any for you.  Periodically check Ebay -- at the writing of this, Ebay has two available (search: CTMH organizers).  Local thrift shops/garage sales might be another place to check as well.  I found one of my organizers at the local thrift shop for $5.00--I admit, that was a great find.

SPECIAL NOTE TO CTMH CONSULTANTS -- if you have some of these organizers left to sell, new or used, please comment on this post with your web address or email so others that may be interested can contact you.

Alternatively, if you aren't able to afford these organizers, or if you are unable to find them, -- maybe this posting will give you some ideas about what type of storage to look for to give you similar results.

The handles make it so easy for transporting to crops!
I labeled the front of my organizers with what I have in them, and have them stacked on a bookshelf for easy access.   Most of my smaller embellishments fit in these small jars such as: brads, eyelets, buttons, baubles/dew drops, & miscellaneous type items.  I also have the majority of my embossing powders portioned out in the small clear jars, & labeled with a Sharpie -- I keep the regular sized jars put away in a separate drawer until I need to refill the jars.

Embossing Powders, Baubles, & more
A great tip for buying embossing powders is to find a friend, split the cost,
and share the powder using small jars -- the powders go a long way and this is a good
way to experiment with a lot of different colors, while helping your money go further.
Brads, Buttons, & Confetti
A surprising amount of fun goodies fit into these small jars!
Eyelets & Miscellaneous items
This was the one I found at the Thrift Store for $5. I had an extra eyelet setter
I wasn't using, and added it to this box -- handy to have, just in case.
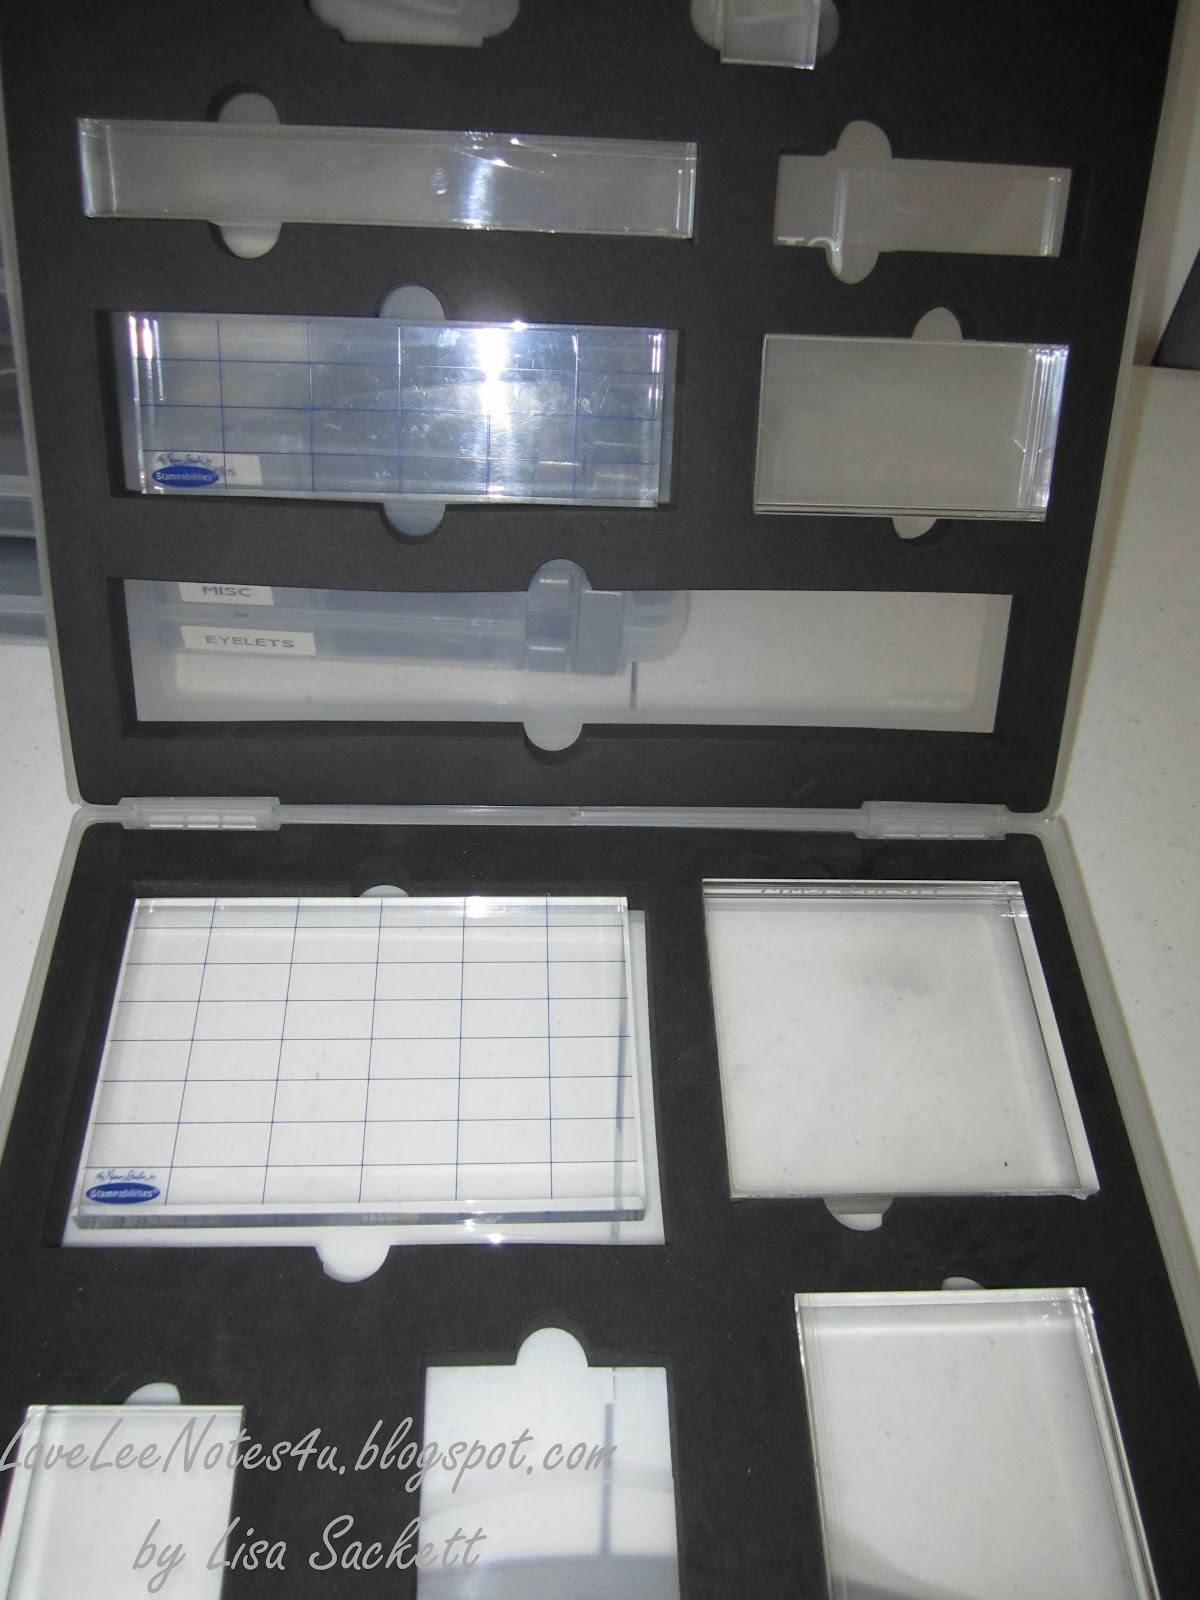
I don't get as much use out of my Acrylic Block organizer anymore (though I keep them, as I like the weight of them for some stamp impressions).  I've since moved to using Tim Holtz' Grid Blocks.  These are FABULOUS, come in a great variety of sizes, and take up very little room.  Tim is sharing a great way to store these on his blog today that you'll love--I think he said it cost him 69 cents for the storage!  I'll be sharing my storage idea for stamps & such next week (stay tuned).

I don't have all the acrylic blocks filled with CTMH blocks, but this
was another great thrift store find, I forgot about, I didn't want to pass up.
The bookshelf I keep these on is in the closet.  When my craft room is cleaned up nicely, it still makes a great, small extra bedroom for guests.  I'll be showing my workspace sometime next month, and you'll get the big picture of why I need to find creative solutions for organization.

Thanks for hanging out with me today. 
Happy Dayz --  Lisa