


I have another great tip today in regards to giving your project some new dimension with repurposed materials. Usually when we want to add depth/dimension to a papercrafting project we would add pop dots, foam squares, or mounting tape to the underside of our papers/embellishments to pop them up. These can be acquired pretty inexpensively these days--for instance, at a local $1 store. However, my tip today is to save you some pocket change by using what you already have at home. Try some of these ideas for some no cost, but effective ways of adding dimension to your cards, scrapbooks, or other papercrafting projects you might have:
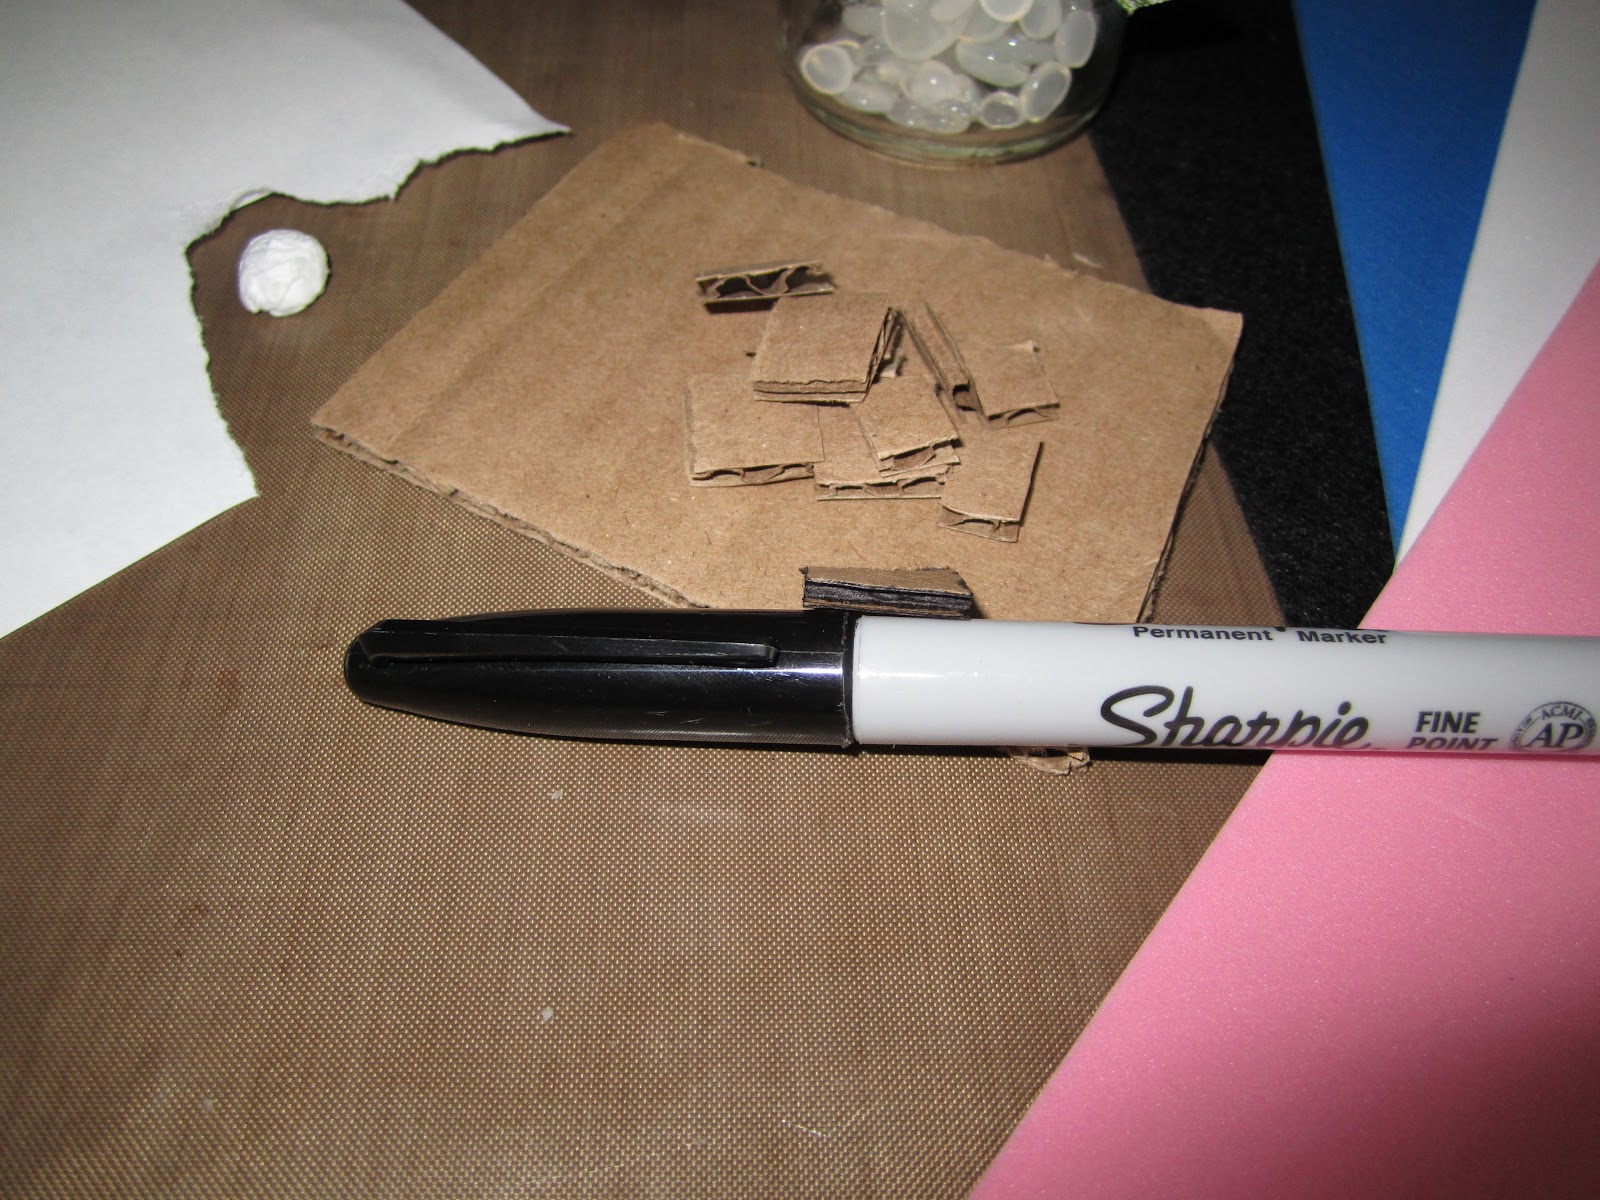
1. Cut corrugated cardboard boxes (or shipping boxes) into small squares, based on your project size (you can also use a hole punch or circle/square punch to cut your cardboard if it fits in your punch--but I found sissors to be much faster/easier to use). Take a black permanent marker and color the sides of the cardboard to "camouflage" it when using in your work. Adhere the cardboard with glue stick or a wet glue to your project to pop an image/text. Double stack the cardboard squares (use a wet glue to sandwich the cardboard together) to add even another layer of dimension.
2. Use your hot glue gun to make small glue dots onto a silicone pad (craft mat, baking sheet, etc.), and let cool completely. Once cooled they will be solid and ready to use -- simply place the glue dot on your silicone pad or craft mat and hold a heat gun over the top until the cloudiness of the glue starts to clear (about 7 seconds) then press your cardstock onto the glue dot. Turn your cardstock over and heat the other side of the glue dot again and add your embellishment onto dot when it starts to become clear. Don't leave the heat gun over the glue dot longer than 10 seconds or it may completely melt your glue. Store your homemade glue dots in a baby food jar or other recycled container until you're ready to use them.


3. Take a small section of printer paper, or other lightweight paper, and scrunch up into a 1/4" - 1/2" ball. Add a wet glue to the ball and work in with your fingers until sticky but not soaked. Press onto your paper project with a craft stick (or popcycle stick) and add your top paper layer you want "popped", pressing down slightly. Leave set to dry 5-10 minutes.
4. Kid's Fun Foam comes in a variety of colors which you can cut up just like the cardboard and use to color coordinate with your project, so it will blend into the background without having to color the sides with permanent pen. I have found that a strong adhesive (such as Scor-tape, The Ultimate glue, or Glossy Accents) works best in adhering this type of mounting foam to your project. If you're double stacking the foam for extra depth, use a hot glue gun to adhere the pieces together--this helps to "melt" the foam together and keeps it from separating. When the hot glue cools, you can trim off any overflow from the edges before adhering to your project.
5. You can use the styrofoam from the packaged meats at the grocery store much in the same way as the cardboard above -- just make sure it's well sanitized first. Use an emery board to sand off the finish of the smooth styrofoam packaging to give it some tooth--apply to project with a wet glue or strong dry adhesive.

Have a look around your home, you just might discover something old you can "re-new" again.
Happy Crafting!
Lisa


Oh and I just ordered some glue dots! Really like your pop up ideas! I bet I could even talk my DH into cutting up a bunch of various items for me and use the, "I am trying to save you money" routine! Hope you tea helps and you get to feeling better. That tea does sound delicious!
ReplyDeleteIncredible tips! We can all save a few dollars here and there... and then spend it on something wonderful that we always wanted! Keep those great tips coming.take care, gerri
ReplyDelete