Saturday, June 11, 2011

A Supercalifragilistic Proper English Tea - Tea Party Part5


A Supercalifragilistic Proper English Tea
"Practically Perfect in Every Way"
 Well, today is the final installment of my five part Tea Party series!  If you are just joining in, you can click on the links for the other postings:

Tea Party Part1 - The Theme
Tea Party Part2 - The Menu
Tea Party Part3 - 1200+ Cricut Cuts
Tea Party Part4 - The Decorations

Today I'm ending the series with the actual event highlights--and integrating all the other parts of the series into the "main event".  This was SO much fun, but definitely a lot of work went into it.  Though we had a planning team of six, we had some extra help with the decorations and food assembly which really helped in final preparations.  One of the things that made this tea party so fun was that several men & teenage boys from our church, including my husband & son, waited on us ladies!  They plated the food, served the food & beverages, and even washed the dishes!  You might even say that they were at our "beck and call".  Just don't tell my hubby I said that -- LOL.  They weren't so interested in our tea party food for sustenance...so we made sure to have plenty of pizza for their hearty appetites.

I guess the best way to tell the story is through pictures, and there's a lot -- but I hope you enjoy the journey!

Morning of...sandwich prep!  Audra, Marilyn, & Marion
   
Before the guests arrive


Menu, Table Number, and Tea & Conversation Cards

Parasols for the "young" ladies, and Door Prize baskets.
Door Prize questions were based on the Tea & Conversation Cards!
Final preparations for a cute skit dancing with umbrellas
Let the tea party begin!

Tea Time with friends

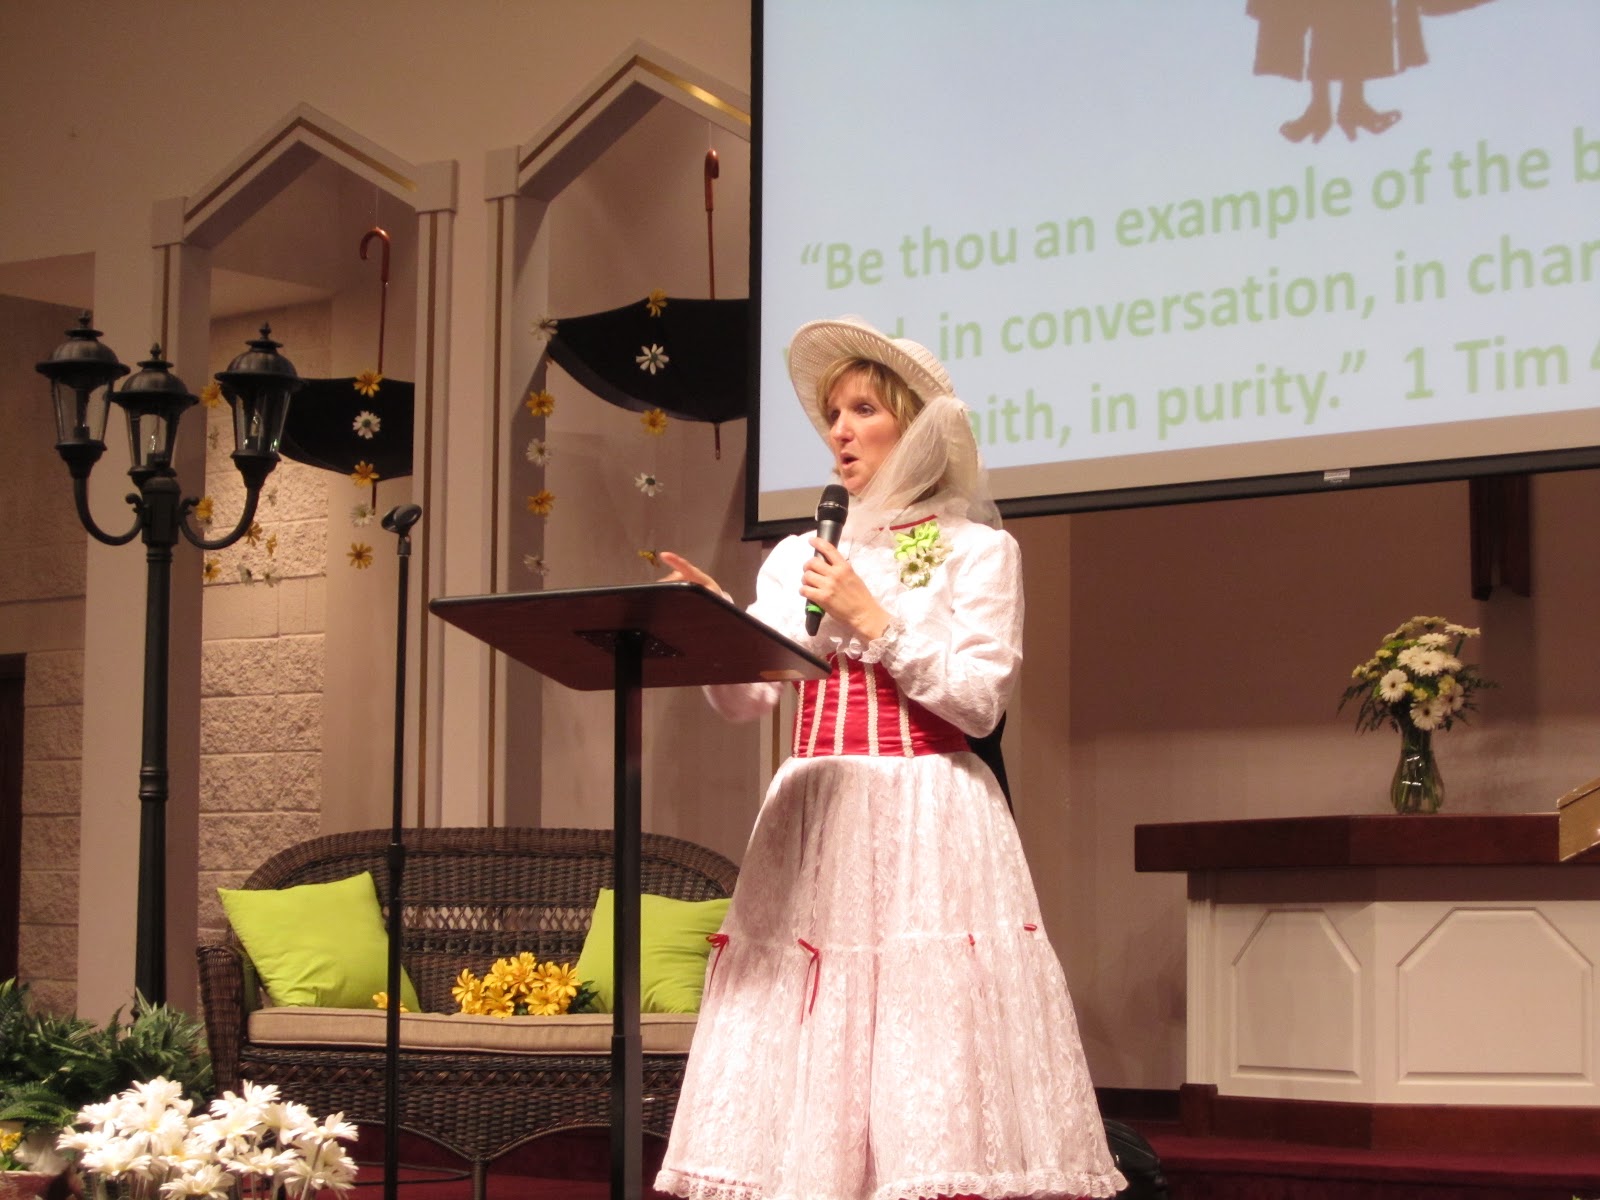
Mary Poppins (aka Julie) has arrived!
My son, Cody, waiting tables

My husband, Chris, in the background helping the guests.

Our waiter serving tea to Marilyn & her Mom

"First of all I would like to make one thing quite clear...
I never explain anything."

Jenny Land, our speaker (Julie's sister)
Spoke on our conversation w/God, and each other...
a wonderful speaker!

Alice in Wonderland teacup, brought by one of our guests.
I love this tea cup -- I'm a big Alice fan!
Our wonderful planning group for this fabulous tea party:
Audra, me, Julie, Lisa, Marilyn, & Debbie

It was so nice to have my guys here,
since I didn't have any family nearby!
It also wasn't half bad to be waited on by them either.  LOL

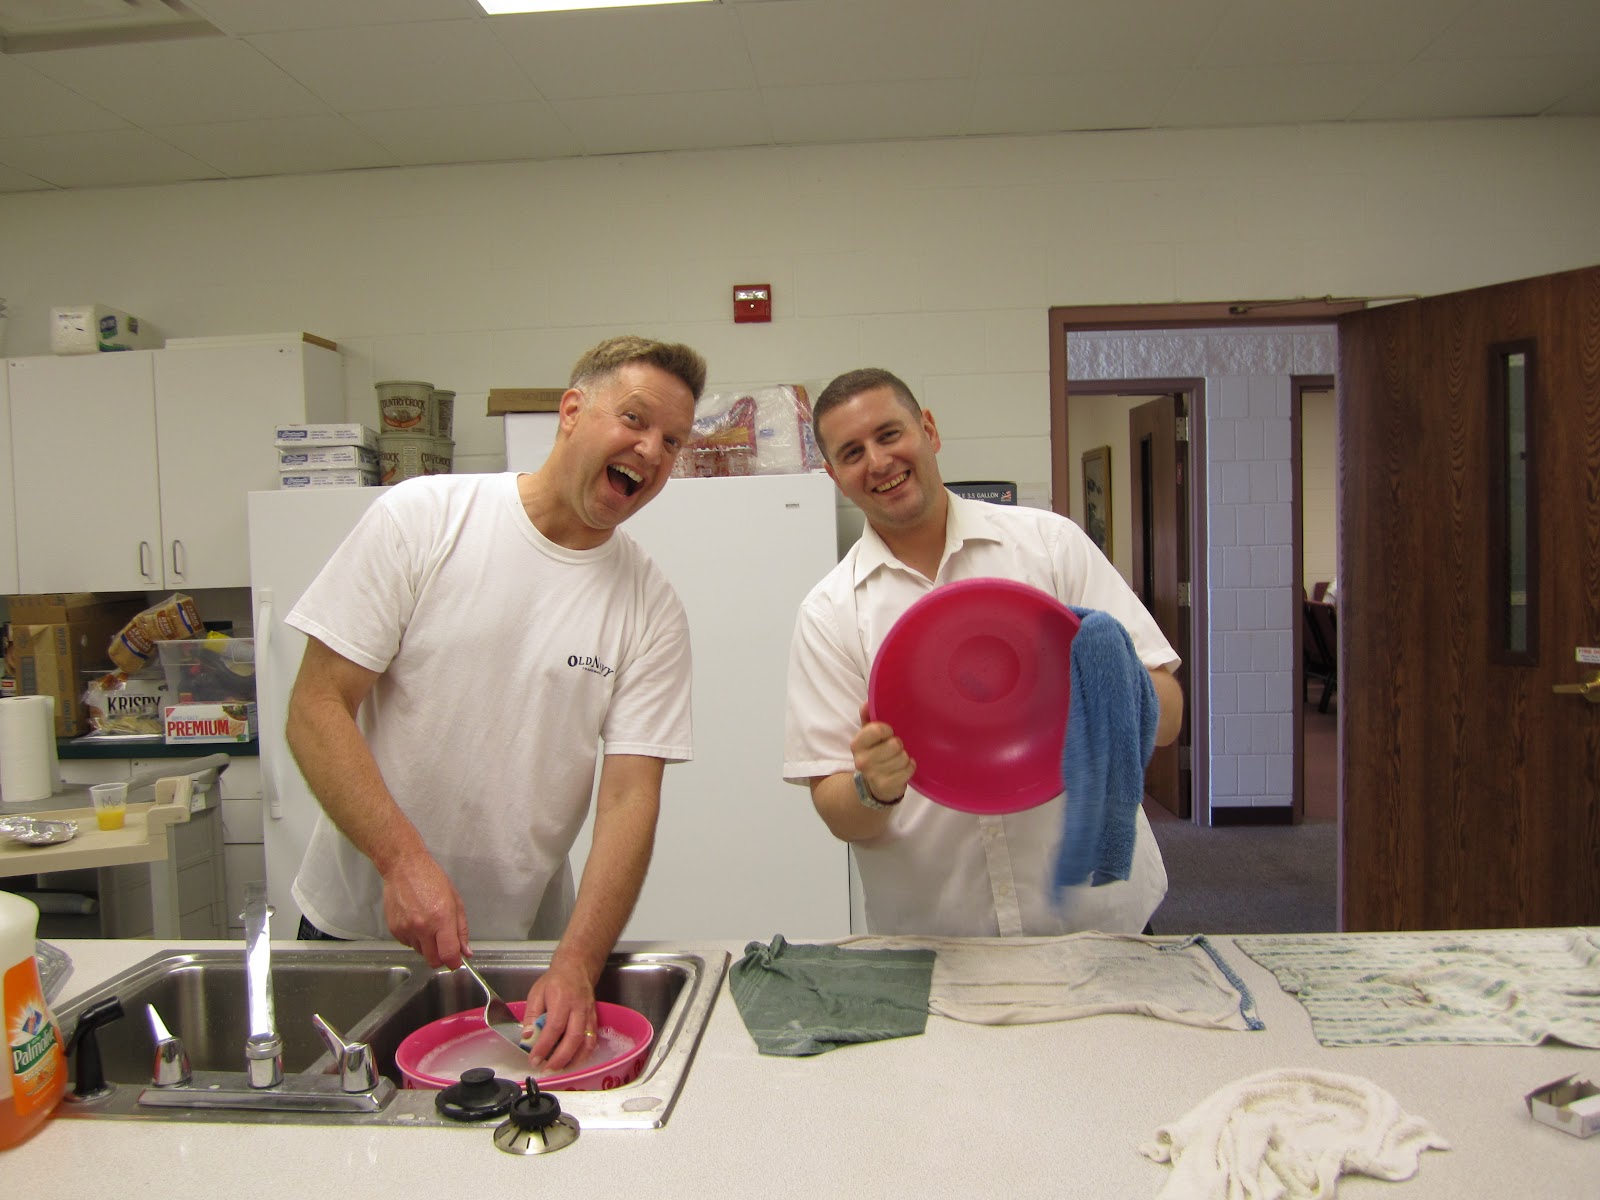
Finishing the dishes -- and happy about it!
John, Marilyn's hubby, and Chris...mine.  =)
Now if they'd only do this at home...[sigh]
Thank you for joining me on this fun Tea Party adventure!  I hope it inspires you to invite someone over for conversation and tea...or whatever it is you enjoy...remembering to enjoy each moment, as they pass by much quicker than you think.

Finally, as I conclude this series, let me leave you with the scripture that was the cornerstone of our tea party: 
"Be thou an example of the believers, in word, in conversation, in charity, in spirit, in faith, in purity."  I Timothy 4:12

Blessings, Lisa

Thursday, June 9, 2011

Tea Party Part4 - The Decorations

Nearly to the end of my 5 part Tea Party series -- today I thought I'd show a few pictures highlighting the decorations and table service that we put together for our Supercalifragilistic Proper English Tea.  If you've been following along with the series you know that the colors we used were lime green, yellow, black/white;  we also integrated a Mary Poppins theme using umbrellas & daisies too.  If you want to catch-up with our tea party series you can check out the following posts:

Tea Party Part1 - The Theme
Tea Party Part2 - The Menu
Tea Party Part3 - 1200+ Cricut Cuts

setting up the tables

the screen is being set up for a Mary Poppins sillouette

the umbrellas were hung by strings that you couldn't see unless up close
and the daisies were strung on to fishing filament

prepping the daisy centerpieces

this became a favorite setting for picture takers


set up for the early birds so they could snack on
poppy seed muffinettes & lemon curd
Notice the absence of tea cups??  Conversation starter...
we had everyone bring their own unique cup!
If they didn't have one, we had a supply table set up.
Beverage Table -- three specialty teas from England market
Mango, Summer Tea, & Chocolate Cream Tea
And soon to be set up with flowering teas, and
English Lemonade fizzy drink, & Orange Squash

Our table of tea cups for those that didn't have one to bring...
or forgot theirs.

Tea cup table

Set up for our photographer to take photos --
the trees lit up with beautiful white lights

Not quite finished, our table for collecting tickets and
greeting our guests--see all the confetti?!
Our entrance into the Tea Party --
the balloon daisies were made by one of our missionaries!
Thanks for following along--I hope you enjoyed the photos of our decorations!  Now for a quick tutorial for one final element you may have seen on the tables above--a box of "Tea & Conversation Cards"!


Becca at Amazing Paper Grace has a video tutorial of a similar box she made that is fabulous.  I'll post the link at the end of this post as it may help you to visually create this box, but also give you more ideas for other size boxes.  This is basically the same type of box as Becca's, but I figured out the dimensions a bit differently to hold 30+ "Tea & Conversation Cards" (you could also use these as business card holders). 

For the cards I used Business Card sheets for the printer and typed up a variety of facts & trivia regarding the ceremony of tea, adding tea time watermark pictures in the background, and printed about thirty different cards for each box.
For the boxes: 
- Cut a piece of deco cardstock 6" x 7". 
- With the 7" side against the top of your scoreboard, score at 2 1/4", 2 3/4", 5 1/8", 5 5/8"
- With the 6" side against the top of your scoreboard, score at 5/8", 1 1/8", 4 7/8", 5 3/8"
- Note where the flap of your box will be after you've completed scoring--the smaller of the three center boxes is your flap! 
- For the center box on the other end (opposite the flap) use a circle punch to cut a half circle, which will make removing the cards easier.
- Starting on one side at the inside vertical score line, cut from flap edge to the last horizontal score line, and cut off side piece.  Do this to both sides, as in the diagrams below.  It should now look like the shape of a shirt.
- Use a corner rounder to round four corners (or just shape with your scissors).
- Fold on all the score lines.
- Apply strong adhesive to each side of end flaps (far side flaps only) where you cut your circle punch (on the deco side of your paper if you're using one-sided deco cardstock).  Fold box with adhesive holding box shape together.
- Apply a small piece of velcro to flap to create a closure for your box. 
- Decorate as desired.  I used Martha Stewart punches to create the flowers for our tea party boxes.


If you're still a bit unsure of this technique, check out Becca's video tutorial for her box...and some other ideas too. 
I'll be finishing the series by this weekend with everything finally put together for the main event. Maybe you'll find some inspiration along the way for a one-on-one tea with a friend, or a family get-together, or an office party, or whatever that special moment may be. =)

Blessings for a beautiful day!  Lisa

Monday, June 6, 2011

Tea Party Part3 - 1200+ Cricut Cuts


In continuing with my Supercalifragilistic Proper English Tea Party series (that's a mouthful) I gotta give up kudos to my Cricut Expression!  Omigoodness--what a life saver when it came to party favors and such!  I've used my Cricut for things here and there, such as showing my son how to use it for his school poster projects, and for a variety of projects & cards -- but to use it to this extent was a first even for me. 

[If you're just joining in on the Tea Party series, you can catch up by clicking on the links for Tea Party Part1 - The Theme, and Tea Party Part2 - The Menu.] 

I mentioned in an earlier post about making a satchel type purse for all of our guests -- we decided that these would look great at each place setting filled "Cloudless Sky Meringues".  These scrumptious vanilla meringue puffs were made with a very high quality vanilla which left the meringues white instead of light brown, and they became our "take home treats" for each of the ladies (both young & old) in attendance.  You might remember, the colors we picked for the tea party were yellow, lime green, & white/black.  So when I was looking for a sturdy cardstock to make these satchels I hit the jackpot when I found DCWV Lemon Paper Stack!  All the colors worked perfectly for our theme--and JoAnn Fabrics was having a sale too!  Regularly they were $19.99, and at 50% off I got three stacks for less than $30!  We were anticipating up to 150 guests so this was a great money saver!


I made the satchels with the Forever Young cartridge (flower9 purse), using the Fit-to-Page feature for my 12x12 mats, and because I was making so many (I think I ended up making around 125) I also used my 12x24 mats. For the longer mats, instead of using Fit-to-Page, I set my dial to 6 1/4", which is what the Fit-to-Page feature calculated the purse size to be. I will tell you though, that if I tried to cut the purses at 6 1/4" on the 12x12 mats it wouldn't let me-saying it was too large a cut. So I think the size varied about 1/8" or so. But you couldn't tell the difference by looking at the completed satchels. I cut a daisy for each satchel from the Picturesque cart out of white Colorbok textured cardstock, and though I could've cut the centers of the daisy out with the same cart, one of the gals (Debbie) at church offered to cut them out of yellow felt--which added a nice texture to the daisy. I have yet to try cutting felt with my Cricut--but I've heard it can be done. Instead of using the pre-cut lines to tuck in the purse satchel flap, we used a small bit of velcro to fasten the latch--that way we could control how large the opening of the purse was. This helped when filling the satchels with meringues!  There was still an unused space on the cardstock that didn't get cut, so I used my paper trimmer and cut the additional off which were perfectly sized mats for the standard A2 size card!  Now that's more bang for your buck!  =) 

Luckily I didn't have to assemble them myself.  All our team members, and a few of their teenagers, got together for a craft night at church...specifically for putting these purses together.  I had most of the cutting already done, but I brought my Cricut for some extra additions.  We had a good time together--I even brought my camera.  Unfortunately, I didn't take even one picture.  =(


We also decided to make our own "sillouette" confetti for the tables, using black cardstock and three different designs: a woman's profile w/hat, an umbrella, and a tea set. The umbrella came from the Forever Young cart, and the woman's profile (Slhoet10 in shadow) & TeaSet came from the Heritage cart. I cut about 300 each -- so we had a lot of confetti!


Finally, to number each of the tables I cut larger daisies, this time cutting yellow cardstock for the centers. I used the Nifty Fifties cart for the numbers 1-20, cut out of black cardstock. Originally we had planned to tack these to the Menus using removeable glue dots, but the menus weren't sturdy enough. So we decided to use the same glue dots to attach the daisy table numbers to the the stands holding the menus, and it turned out very well.

For the Beverage Table I cut three placecards from the Thanksgiving cart.  I used textured light green cardstock for the base & black for the frame.  I printed the beverage names on vellum with my computer and layered it between the frame & placecard.  This was the only cartridge I had that has placecards on it.  I'm wondering if there are others? hmmm


Okay, so if you've been following the math on this you may have come up with the number of cuts my Cricut made, which is about 1227 cuts! When I first got my Cricut in December 2009, I used it for card making on occassion, and a small variety of projects...including when my son used it for his poster projects. I've only cut chipboard with it a few times, so the majority of cuts has been on cardstock. I'm telling you this to say that I have not changed my blade once during that time! Yep--even with the 1200+ cuts I just made. But I will also tell you that I will be changing it soon. =) I started with my blade set to 4 and my pressure to 4. I've only recently (after the tea party) changed my blade up to the max at 6, and my pressure to max. So I'll get a few more cuts out of it yet before changing the blade. Not too shabby considering the blades are $14.95 each (approximately) -- I'd venture to stay that is getting your money's worth! ha ha...

Now, if any of you watched the debut of the Cricut Expression2 on HSN you might have heard me as a call-in talking to Jinger about the 1200+ cuts I had recently made with my current Cricut Expression for our tea party! Both she and the host were certainly surprised -- and yes, I did nearly all those cuts in one weekend. And I would certainly not advise anyone to do that--that's just crazy!

For those of you that do not own a Cricut, and have read down this far, check back with me in another day or so for Part4 of my 5 part Tea Party series: The Decorations.  I'll have a tutorial that does not include the use of the Cricut.  =)

Thanks for hanging out with me...Lisa


Sunday, June 5, 2011

i love you Grungy #9


A quick pop-in today with a tag for Linda's Studio L3 Grungy Monday challenge, using a technique by Tim Holtz.  I wish I had time to participate in more challenges, but somehow I always seem to have major projects looming ahead.  The one I'm currently working on his my son's Memory Book for his 16th birthday, June 19th!  Not much time, and a lot to do. 

For this tag, I followed Tim Holtz tutorial and actually actually added one last layer in black...especially since my hubby wouldn't be "over-the-moon" about the pink.  I think it added just a bit more gunginess ... though the glitter flower, rhinestones, & stickles may not be all his style either. LOL  At any rate, he's gone for the next two months on TDY (temporary duty assignment), and I was thinking of him when I made this tag. 

LoveLee supplies:  Red Pepper, Snow Cap White, Cloudy Blue, Shell Pink, & Pitch Black Acrylic Paint Dabbers, Ranger clear embossing powder, Waterfall Stickles, Faded Jeans Distress Stickles, Stampabilities French Blue die ink (for the frame), fibers & embellishments, and Tim Holtz #8 Tag & Bookplates die.

If you get a chance, check out Studio L3 for Grungy Mondays -- there's a lot of inspiration there!

Back tomorrow with Part3 of my Tea Party series, and lots of Cricut cuts!  Thanks for stopping by!  Lisa

Friday, June 3, 2011

Tea Party Part2 - The Menu

What makes a tea party great?  The conversation!  But almost always, the conversation after the tea party will revolve around the food.  I got together with Lisa & Debbie from church for another teatime tasting, to determine our menu for our church's Mother-Daughter tea, which we named:  A Supercalifragilistic Proper English Tea.

[If you want to start at the beginning, be sure to check out my first posting: Tea Party Part1 - The Theme.]

Lisa has done nearly all the cooking/baking for the church tea parties in the past, so Debbie & I hooked up at her house to finalize the menu details--and taste test, of course.  This time we had poppy seed muffins w/lemon curd, strawberry salad w/poppy seed dressing, and honey fruit salad (made by Debbie).  Ooo so good!  I was supposed to bring strawberry meringues--but after three attempts of them all falling flat (like liquid flat) I gave up.  I did eventually figure out WHY they went flat--the strawberry extract I used was oil based!  Now who does that?!  I love to cook, but was begining to get a complex--until I thought to check the extract bottle.  Go figure--but my mistake is your gain.  Now you know what not to do.  Ha ha!

Anyway, needless to say, we were able to finalize the menu!  I used MS Word to create our table menus, taking part of the images from the invitation as the menu graphics.  It took quite a bit of image & text piecing, but I was happy with the way it turned out.  I printed them out on parchment paper, in keeping with our invites, and laminated them for durability.  You can click on the picture to enlarge it for better reading.  [To look at a picture or link in a new tab/window, right click on the picture or link and click on "open in new tab/window".  You'll then be able to enlarge it by clicking on the picture].

Our Menu:
On the Table:  Poppy Seed Muffinettes & Lemon Curd
                         Still Water for Drinking & Hot Water for Tea
                         Tea Samples, sugar & milk
                         Poppy Seed Dressing (for salad)
                         Butter & Jam (for scones)

Tea Plate:        Cucumber Tea Sandwiches
                         Traditional Ham Sandwiches
                         Cheese & Pineapple Nibbles
                         Apricot Scones w/butter & jam
                         Fresh Strawberry Salad w/ Poppy Seed Dressing

Pudding:         Custard Pie & Honeyed Fruit Salad
                         Jam Tarts

Take Home Treats:  Satchel of Cloudless Sky Meringues

Beverage Table:      English Lemonade Fizzy Drink & Squash
                                  Tea Samplings from Suffolk, England

~~~~~
Below I've included a few of my recipes you might be interested in trying.  They're all delicious...but if you only try one, you gotta give the lemon curd a go.  It's sooo good! 

~ Note:  all purpose flour is used in all these recipes.  Enjoy!!

LoveLee Lemon Curd   (lovely on crumpets or toast, or on top of a meringue)

5 tbsp unsalted butter
1 c. sugar
Juice & Zest of 2 lemons (approx. 1/3 - 1/2 c. juice)
3 eggs
- Place all ingredients in saucepan, except eggs.  Heat to boiling, then remove from heat & strain out zest.
- Wisk the eggs and temper with the hot lemon sauce a bit at a time. 
- Once eggs have tempered, add to lemon sauce in pan and cook over a low heat until thickened.
- Remove from heat.  Pour in tempered glass to cool.
* Stores up to 10 days in fridge.
**Note: Do not use aluminum pan!**

Custard Pie  (my MIL's recipe)

3 eggs
1/3 c. sugar
1/2 c. flour
2 c. milk
1 tsp. vanilla
1/4 tsp. salt
- Blend together well. 
- Pour into ungreased pie pan & bake 45 min. at 350'F.  Will be soft set & golden.
- Cool completely before serving.  Refridgerate remaining.

Honeyed Fruit Salad  (a sweet & tart scrumptious fruit salad--and easy!)

Toss together 2 c. each of the following:
  Seedless Red Grapes
  Strawberries, halved
  Kiwi Fruit, sliced
Mix together honey & lemon juice:
  1/4 c. Honey
  2 tbsp. Lemon Juice
Pour over fruit and toss together. 

Cheese & Pineapple Nibbles

Cheddar Cheese (or cheese of your liking)
Pineapple Chunks
- Spear together on a toothpick for a tasty snack (and healthy too).

Cucumber Tea Sandwiches  (you won't know how delicious they are until you try them!)

4 oz. Neufchatel Cream Cheese, softened
1/2 tsp. dried dill
1/2 tsp. dried parsley flakes
dash of pepper
1 small cucumber, peeled & thinly sliced
6 slices white or wheat bread
- Mix cream cheese with dill, parsley, & pepper. 
- Spread each slice of bread with a layer of the cream cheese mixture.
- Place cucumber slices on 3 of the bread slices, and cover with remaining bread.
- Trim crusts & cut each sandwich into four sections.

Apricot Scones  (my favorite are Pineapple & Banana**)

2 c. flour
2 tsp. baking powder
1/2 tsp. salt
2 tbsp. sugar
1/2 c. (1 stick) butter, cut into small cubes
3/4 - 1 c. dried apricots*, chopped
3/4 c. buttermilk, + extra for glazing
Demerara, Turbinado, or Raw Sugar for sprinkling (regular sugar would also work)
- Preheat oven to 400'F.
- Combine first 4 ingredients in electric mixer. 
- Using the paddle attachment, mix in the butter just until coated with flour.
- Add the dried fruit.
- With mixer on low speed, add buttermilk and mix until just absorbed.  Stop mixing when the dough begins to pull away from the sides of the bowl.  Dough should be somewhat sticky.
- Scrape dough onto lightly floured surface and shape into ball (important that you do not knead dough, which will make the scones tough).  Flatten ball to a wheel size, approx. 1" thick.  Cut into 8 pie shapes slices.
- Arrange on baking sheet covered with parchment paper.  Brush scones with buttermilk, and sprinkle with sugar.
- Bake until golden brown, approximately 25 minutes. 
* Note:  any dried fruit will work with this recipe
** Note:  if you'd like to try the pineapple & banana, substitute the dried fruit with 1/2 c. dried pineapple chopped, and 1 banana, chopped.  Reduce buttermilk to 1/2 c., adding extra only as needed.

~~~~~
By the way, did you catch our menu's thematic food inclusions?  Poppy Seed Muffinettes, Poppy Seed Dressing, Satchel of Cloudless Sky Meringues ... in honor of Mary Poppins, of course.  =)

Join me in an upcoming post for "Tea Party Part3 - 1200+ Cricut Cuts".  I'll share some of the things made for our tea tables...including the satchel I talked about in part one of my five part Tea Party series. 

Thanks for stopping by!  Lisa

Wednesday, June 1, 2011

Tea Party Part1 - The Theme

At long last I'm getting around to posting about the tea party I helped put together for our church's Mother-Daughter Tea--the day before Mother's Day this year.  I worked with five wonderful ladies at church who all helped make this a success--giving a shout out to:  Julie, Marilyn, Audra, Lisa (another one), and Debbie. 

For our initial planning meeting we had to first come up with a theme.  So I invited the ladies over for tea one evening so we could get our heads together.  I was thinking of moving in the direction of "tea & conversation", with a proper English tea.  Since I had lived in England for five years (and loved it), I called my English friend, Teresa from Bury St. Edmunds, for some ideas as well.  I decided to have a sampling of English teatime recipes for our informal tea get together--to help get our creative juices flowin' (so to speak).  Our tea sampling consisted of: Yorkshire teacakes with lemon curd, pineapple & banana scones w/jam & butter (sure wish I had clotted cream), Branston pickle w/cheese & crusty bread, cucumber tea sandwiches w/dilled cream cheese, mature cheddar w/red onion & homemade tomato chutney sandwiches, custard pie, & jam tarts--and tea, of course.  Okay, I went a little overboard for my informal tea get together but it was a delicious start for putting our ideas together.  =)

I remember, it was some time before we moved to England--my hot drink of choice was primarily hot chocolate (not ever being a coffee drinker--sorry), and we had just started attending a new church with our young family.  A wonderful English lady had invited me over for tea, and I'll never forget that experience, ever.  When I got there, we sat down together in her living room and she brought out tea on a lovely tray with a dessert plate of candy bars cut up into manageable pieces.  So, while we sipped our tea, we munched on candy bars and had a wonderful chat!  She asked me about myself and my family, and I learned a bit about her and what it was like when she lived in England.  It was then I realized for the first time--sitting down to have tea with friends or family isn't about the tea, or even what you serve; it's all about the conversation!  When we eventually moved to England it was no different there--whenever I was invited to tea, whether it was a big to-do or one-on-one with a friend, it was a time to relax, enjoy the company, and a wonderful time to simply converse.

Along with the informal tea I also made a satchel type purse (more on that in another post) I thought would be nice to have on the tables for each of the attendees.  It was with this satchel, and our teatime treats, that we jointly came up with the idea of integrating "Mary Poppins" into our tea party--and so, we aptly named our Mother-Daughter tea:  "A Supercalifragilistic Proper English Tea"!


First things first--the invitation!  Now I was thinking a nice invite in the church bulletin would be okay...but apparently individual invitations have been mailed out for quite a few years.  So in keeping with that tradition, I made our invitations on MS Word.  While I would've liked to have made them by hand, there just wouldn't have been enough time to make 150!  I used Google to find some images and created my own template on Word.  It was time consuming as I hadn't used Word for this capacity until now, but I was pleased with the outcome.  I printed them on parchment paper and Audra helped get them ready for mailing--Thanks Audra!!


Our theme ideas included:  Mary Poppins, daisies, umbrellas, theme title, satchels, invites, colors (lime green, yellow & white/black), table designs, and guest speaker.  I think we accomplished quite a lot in just a couple hours time.  Not too shabby!

Stay tuned for Part 2 - The Menu ... I may even have some delicious recipes to share.  =)

Have a lovelee day!
Lisa