Thursday, February 24, 2011

Altered Ancestors

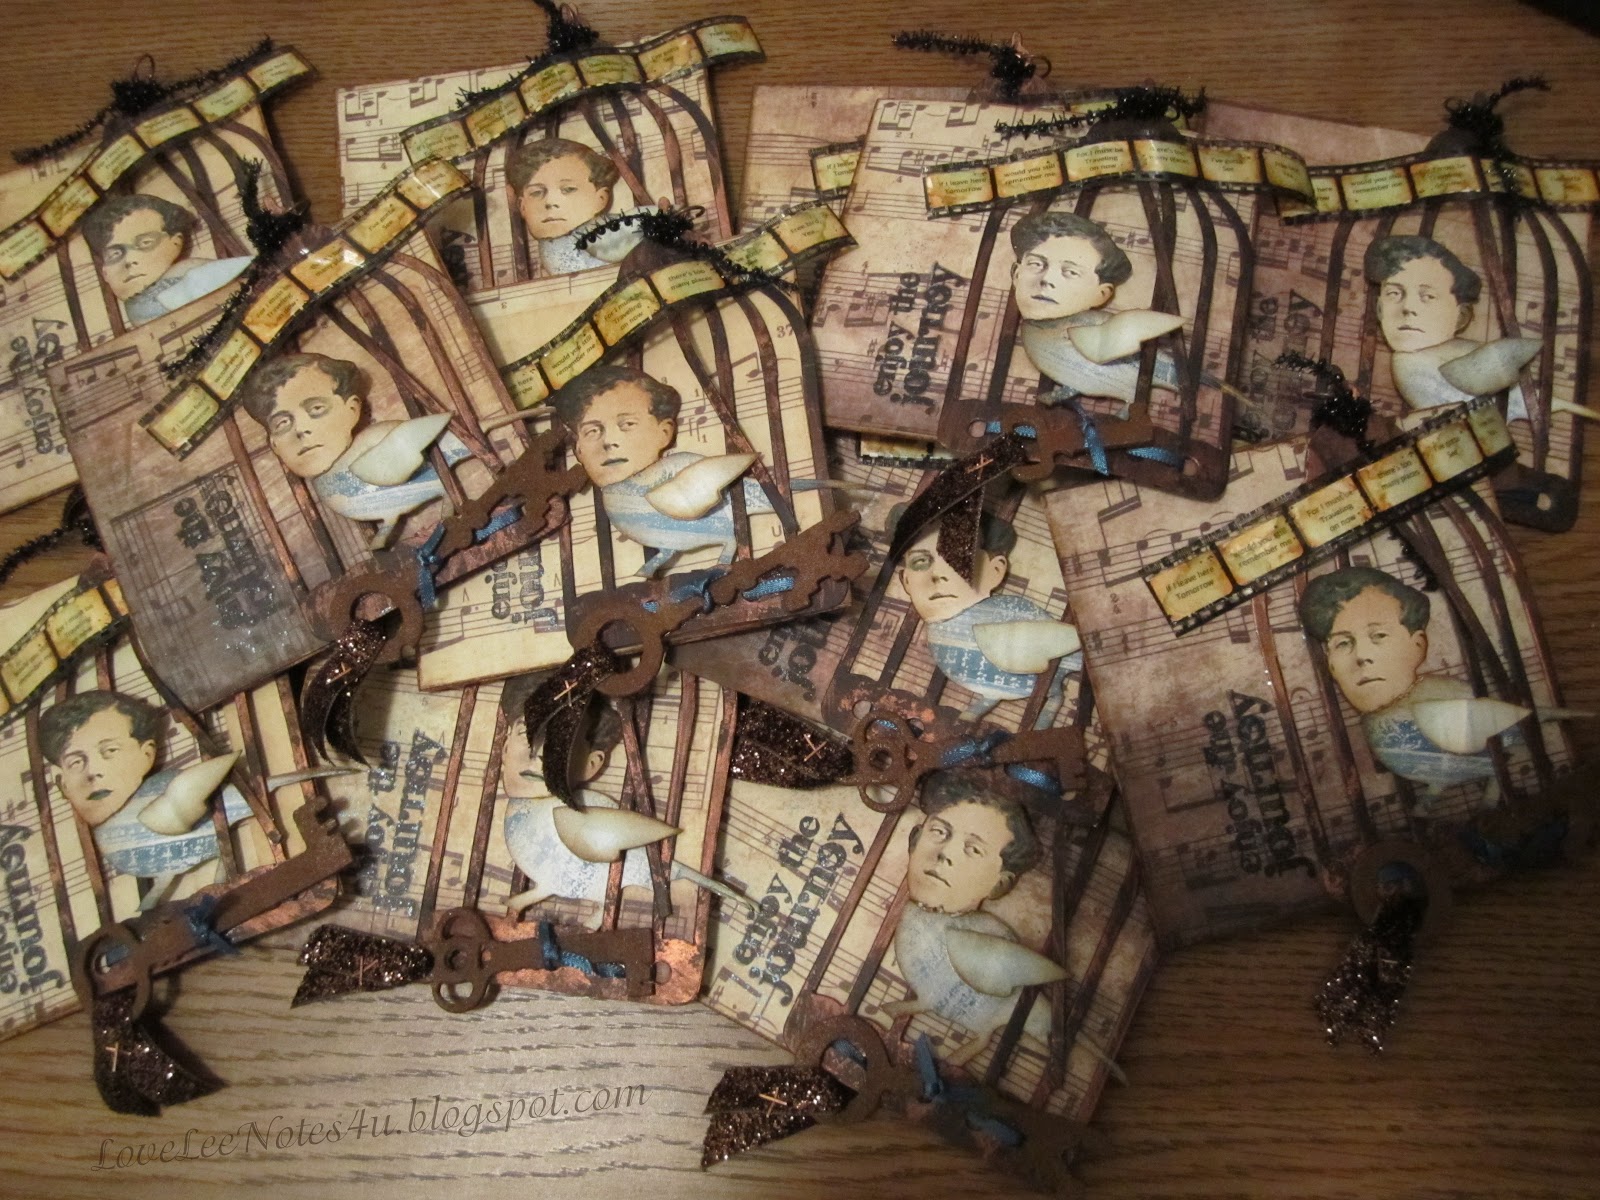
Altered Ancestors book page -- great grandfather "Free bird, yea"
I've been busy like crazy this week finishing my Altered Ancestors book pages for the ATT Altered Ancestors Little Fat Book swap...whew...say that fast.  ATT is the All Things Tim (Holtz) group I joined last year.  I saw this swap posted, and since I had never altered any photos like that before I thought I'd give it a try. 

Also, was the fact that just last year my cousin, Kathy, gave me an awesome pocket watch that belonged to my great-great Grandfather, who passed it down to his son, who passed it down to his son, who passed it down to my cousin...who passed it down to me.  That's a lot of passing around...but I do have a point. 

When my cousin gave it to me, she showed me the picture of my great-great Gpa inside.  It looked like an old postage stamp--but it was SO cool when I got it home and photographed it and found out that it was taken in St. Louis!  Funny, since I live close to STL now--though home is in another state! 

Anyway, I was fiddling around with the pocket watch and noticed a small gap on the other side--and what'd ya know, but it opened to reveal a picture of my great Gpa and my great-great Gpa's name etched inside.  It was my great grandfather's photo I used in my altered design.  I think he might have enjoyed it, as he was a bit of a "free bird" himself.

Here's a bit of trivia--my cousin Kathy, also known as Suzanne Walker (stage name), danced with Mikhail Baryshnikov in the Oklahoma scene of Baryshnikov on Broadway while I was still in high school.  Click HERE to watch the 4 min. YouTube video, she comes on the scene at 1:21 in the video.  Growing up, I always wanted to be like her.  =)


Back to my book pages...I needed to make 11 pages, so I made them all the same except for a few changes:  the sizes of the keys (rusted grunge--these were fun to make), and adding a bit of color to various facial features using Stormy Sky Distress re-inker.  For the back of the page I used the filmstrip die for my "Credits" and two different stamps: the "Time" quote & "clock" stamp went perfectly for my "back story".  I like having a bit of a story to special projects I make.
I used all Tim Holtz products, except for my fibers.  These were a lot of fun to make, but time consuming...considering I lost three that I had made!  Who does that?  Seriously, I looked all over the house thinking I must've carried them out of my craft room (which I scoured top to bottom)...but they were nowhere to be found.  I had to run out and buy another paper stash to finish the last three.  [sigh]

Off to the mail!
Thanks for stopping by!  Lisa

Monday, February 14, 2011

Maritial Bliss is a 50/50 Treat

Happy Valentines Day blog friends!  I gotta tell ya...I love anything romantic, but I married the perfect guy to also have fun.  He makes me laugh all the time, which is probably why I feel much younger than I am.  To whit...the other day I was browsing the valentine/candy aisle and came across this 50/50 candy bar--50% his, 50% hers, called the "Martial Bliss Bar".  Of course everyone knows that to keep a marriage happy, the wife needs her chocolate (at least that's they way I've always heard it).  That candy bar says it all...as long as hubby knows what constitutes his "50%" (more like 30%), the marriage should be pure marital bliss!  LOL  So sorry...but I just couldn't resist that candy bar (nor the pun).  So I made this Pull-up Treat wrapper for my hubby for Valentines day--with, of course, the candy bar nestled inside!  There's a great tutorial on Splitcoast Stampers website to make this treat wrapper, I just modified it a bit to fit the size of the candy I used. 

Simon Says Stamp has their current challenge for Anything But a Card until Wednesday, for which I entered this treat wrapper.  I don't always have time to do many challenges, but when I do I always like to check out Simon Says Stamp & Studio L3 (see previous blog post). 

For this project the following supplies were used: 

Tim Holtz (TH) Vintage Shabby Paper Stash inked with Black Soot & Walnut Stain Distress Ink (DI)
"1" "4" textured grungeboard inked with Aged Mahogany DI
"I am so lucky" & "you make me smile" stamps by Clearly Wordsworth
clear stamp "love"
TH Philosophy Tags "Cherish"
TH Journaling Tickets
black satin ribbon
May Arts ribbon, red

I hope you all get to have a little fun today!  Lisa

Sunday, February 13, 2011

Family Time Rusted Enamel CCC #31

I'm finally getting back to some of the challenge blogs I've enjoyed.  This one is for StudioL3's Compendium of Curiosities Challenge #31 -- Rusted Enamel.  I'm getting this one in just under the wire--but important to note that I made it...whew!  I'd been thinking about the phrase, "Time with Family is a beautiful thing", and had the idea of the butterfly wings with a timepiece...with "Family" as the key word, and came up with this tag.  So a play on words, if you will (though I used a different saying on the tag...hmmm).  I followed Tim Holtz' technique on page 41 of his book Compendium of Curiosities for the grunge heart, and used Turquoise Perfect Pearls on the butterfly wings and "Family", and added Cranberry Alcohol ink to the time piece (noting the 1 & 4 for the numbers)...yeah...still sappy for Valentines day!  =)

I'll be putting the rest of my Valentine's gifties up tomorrow--can't let the hubster see what I made just yet.  Until then...have a lovelee day!  TFL, Lisa

Saturday, February 12, 2011

ATT Red & White Valentine Tag Swap

I joined the All Things Tim (ATT) yahoo group last year in the fall after trying my hand at the Compendium of Curiosities challenges & Simon Says Stamp challenges.  What a fun group this is...whether you're already enjoying Tim Holtz techniques & products, or just getting started, this group is the place to be.  They even have their own tshirts & accessories now...but you need to join the group to find out more about that.  It's free to join; click on my sidebar "All Things Tim" for more info).

AnyWay...I joined my first tag swap at ATT and the theme was monochromatic red & white only.  I admit I had to put on my thinking cap, but in the end I do like how they turned out.  I'm just posting this now, because I wanted to wait until everyone received their swapped tags.  I received my swaps in the mail the end of this week, and they are ALL gorgeous!  If I get permission from their designers I'll post what I received...but in the meantime--here's my offerings:

I listed my supplies on the back of the tags (wasn't sure if I was supposed to or not, but I did it in vellum with very little adhesive so they could remove it if they chose to).  The cardstock I used (DCWV Rustic) was more of a red & ivory--I was probably pushing the white a bit on that one, but I added white Paint Dabbers to the edges & stamped a flourish at the top (mostly hidden by ribbon...hmmm).  For my fragments, I stamped the Love Definition from TH Love Struck stamp set onto cardstock from TH Vintage Shabby paper stash, and positioned it in the left corner--so that the Cupid was shooting an arrow into it.  The cupid was one of my favorite pieces.  I used plastic packaging and stamped the Cupid from the Love Struck collection with VersaMark, added Rose Quartz embossing powder (EP) & heat set.  I wanted them to have dimension so I maneuvered them while hot to hold their wonky shapes--if I had wanted them flat, I would've heated them a few seconds longer and they would've flattened out completed (I love using plastic packaging).  Important to note--don't touch the EP while the plastic is still hot or it will come off...ask me how I know. =)

A dab of hot glue on a cardstock center helped to roll my ribbon in place for the rose/flower, and hot glue at
various intervals to keep it in place.  The ribbon wasn't a dark enough red, so I spritzed it with Tattered Angels Candy Apple Glimmer Mist.  I used mini Christmas tree iridescent pearl garland for the beads across  the bottom, and cut up some of the same beads for the center of the red rose.  The cutout quote is from a book I got at the dollar store, some Silver Stickles on the CTMH stamped key (which reacted to the Aged Mahogany ink & turned pink--love it), Martha Stewart red tinsel glitter on the quote, and some ribbon/fibers to finish it up.

This was a fun swap, I really enjoyed it. Currently I'm working on another swap for ATT, "Altered Ancestors Little Fat Book" swap.  I'll post pictures soon!  In the meantime, thanks for stopping by!  Lisa


Chocolate Kisses in a Box


So I get a text message from my son Nathan, now 22, reminding me that he loves Cherry Cordial Hershey Kisses.  I thought it was funny and sweet actually, that he thought I might need an idea for him for Valentines Day.  LOL  I picked up on his "hint", and picked up his favorite kisses the other day--I decided I wanted to package them up in the fun candy boxes I used to give the kids when they were younger.  So it was cool that Cricut's Love Struck Cartridge has that very same box. 

I needed to make it quite a bit larger to hold Hershey kisses instead of candy hearts, so I used my Gypsy to size the box width to 11 1/2" from My Minds Eye Be Loved Sweethearts cardstock.  The original cut had a heart cut out of the box front--I used contour to hide the heart, and cut out the Monogram letter "N" instead, from Gypsy Font.  I wanted to stabilize the box a bit more than just cardstock for holding the kisses, so I used some plastic packaging to stabilize the inside front & back of the box, securing it to the cardstock with score tape.  I added a bit of ribbon & Barn Door Distress Ink to the box--but nothing too girly.  ha ha

You may not notice, but I actually have the box upside down.  There's a tab that fits into a slot meant for securing your goodies for the opening, but I chose to use that as the bottom of my box--which I secured with scor-tape for a good seal.  I wanted the flap for the opening, but I was wasn't sure how to secure it down so that he could open it without tearing it up...and close it back up again when he wasn't scarfing down chocolates.  Initially I was thinking I'd have to use a sticker, but sometime before Christmas I bought some Post-it Craft Paper.  I hadn't even opened the package, but when I went to find a sticker it was sitting on top of my stash--the lightbulb (in my head) went off, and I decided I'd use that instead.  I cut out a 2 1/2" shadow heart w/banner from the Love Struck cart, and because I only had blue Post-it paper...I inked it with more Barn Door ink, and heat embossed it with Stampendous Ruby Red embossing powder.  When it was dry I smudged the edges of the banner with Black Soot Distress Ink, and wrote "Chocolate Cherry Kisses" over the banner (momentary lapse of memory that they were Cherry Cordials--even though the bag was right in front of me). 

I filled the box with the kisses, took the backing off the Post-it paper and sealed the box!  The box held nearly a whole bag of Hershey kisses!  Well, all but the couple (or so) I ate while crafting.  I sent the box on it's postal way via those video size postage boxes--it fit perfectly with his Valentine's card that I forgot to take a picture of.  It was a fun, quick project that didn't take me more than 30 minutes to make...if even that. 

Thanks for stopping by...and have a crafty weekend! Lisa

Wednesday, February 9, 2011

Love in a Paper Bag

I love making paper bag books--you might have noticed from a few other posts I've made:  Lincoln's Birthday Brochure Book and our Disney Vacation.  But I had a goal to accomplish on this one--I had two rolls of valentine stickers I wanted to use up.  Rolls of stickers aren't used nearly as often these days, but they are pretty inexpensive when you consider Jolee stickers have evolved to 3D embellishments in themselves, while the rolled stickers can only be flat.  So I challenged myself to use the flat stickers as the primary embellishment.  I think it turned out nice--and just in time for Valentines day (imagine that).

In addition to my loooove stickers, I used Bazzil cream cardstock (CS), Core'dinations brown/red CS (which I sanded & tore to show the color variations), designer CS (which was in a store bin with no company name, unfortunately), Distress ink (Barn Door, Fired Brick), Tattered Angels Candy Apple Glimmer Mist, & May Arts ribbon -- oh, and a few pictures, of course.


Thanks for stopping by!  Lisa

Saturday, February 5, 2011

Distress Ink Swatch Book


UPDATE - I've updated this post with written directions & YouTube video which you can check out by clicking ---> HERE.

I love using Tim Holtz (TH) Distress Ink!  I think I was completely won over when I learned that the browns didn't turn a muddy green color when added with water -- you know that's right!  When I first started using these inks I kept them upside down (which I still do), but aside from reading the name of the ink, I wasn't able to see the colors.  So, I swiped the ink onto a square of white cardstock and glued it to the bottom of each ink pad.  As I added to my collection I also created white tags inked with the colors of each ink pad & labeled -- that way, when I'd be crafting and looking for a particular color to match my project I could just flip through my ring of tags.  I would take my Distress Ink (DI) tags to the store when I was looking to buy more, so I didn't repeat ones I already had -- this worked out nice at first, but then I'd get annoyed trying to separate the tags to look at each one. 

Did you know that Ranger Industries website has free PDFs of their color charts & labels you can download?  That's when I decided to make this swatch book for my DI.  I cut out the individual swatches and used TH blender tool to blend the color onto each swatch, then I swiped the ink over the top of the swatch for a solid color visual.  I adhered the swatches to the the 2x2 squares cardstock sheet of TH Vintage Shabby paper stash (cutting off 2 rows of squares I didn't need).  I made two cuts, and created a folding technique I was happy with, decorated the front with some flat TH embellishments and used a binder clip to hold the ribbons together for a closure.  After trying several closure options I liked the clip best -- when I released the clip to open the book, I could wrap the ribbon around the back of the front cover and re-attach the binder clip while I flip the swatch card back & forth -- no more dandling ribbons, lost clips, etc. 

I love that this swatch book lets me see my color families at a glance -- and I can see what I am missing since those particular swatches aren't inked (including the pull out tag on the cover that lists what I still need), and it's small enough to fit in my purse and my storage container.   Speaking of my Snapware container -- I got mine from JoAnn Fabrics, and I love it!  I used the DI titles from the swatch sheets and inked them according to the basic inks I have in each compartment which I also labeled:  earth tones/black, red/orange/purple, and blue/green.  Did I mention that there are currently 36 different DI colors available?  I am still missing 7 of those -- but I have plenty of room in my containers for the ones I'm missing.  Besides my ink pads, each compartment also holds a blending tool, cut n dry foam for blending, AND mini misters too.  I like that it doesn't take up much room on my desk either since it's stacked. 

[RePurposing Note:  I used the shoulder ribbon from an outfit for my binder clip.  I never liked those ribbon straps that hold up the outfits on hangers, and I'd cut them off--now I use them for all sorts of things.]

If you need further direction in making one of these, please let me know--hopefully the pictures below will help.  And Hey -- Thanks for stopping by!  Lisa


Friday, January 28, 2011

Getting Cup Cozy with Card Stories

My hubby loves his coffee as much as I love my tea!  So whenever we go out for hot drinks, we always save our cup cozies (I think my DH has decided that if he can't beat my recycling habit, he might as well join me).  I've had a few ideas lurking in my brain for a while about using these in different ways.  One of the most common craft projects is making them into mini books.  I decided to take it a step further and make them into Card Story Cozies (gift card booklets), which I used as stocking stuffers at Christmas time.  But what a fun gift this would be for any gift-giving day! 
I loved the front of the Starbucks cozies this Christmas past that said "Stories are Gifts~Share", so an easy project was made easier because I didn't cover up the cozy with deco paper.  For my older son, Nathan's, cozy I added one gift card slot for a larger gift prize, but with my DH and Cody's cozies I added four gift card slots for 4 separate fun gifts.  There's so much you could do with these, in addition to the gift cards, by adding a small note card, wallet pictures, money, & various odds & ends to each pocket -- lots of possibilities.  An especially fun addition are the "free" Starbucks itunes cards that they come out with each week or so. 
I made these in a hurry since I was so last minute (not as organized as I thought), but that just means they're easy to make.  And here's the LoveLee Recipe:

~ Separate front & back of cozy by cutting left/right side seams (both ends) from top to bottom. 
~ To determine book spine height, measure left side top to bottom--mine measured 2 1/4"
~ For the width of the book spine, determine the number of gift cards and/or tags you'll be using and add one inch for each, plus an additional 2" for front/back attachment.  I had four gift cards, plus a "book of cards" Tag, so my measurement for the book spine was 6".
~ Cut deco cardstock (CS) to the determined measurements, 2 1/4" x 6" (in my case).
~ With CS horizontal, score at 1/2", and every inch thereafter (1/2", 1 1/2", 2 1/2", 3 1/2", 4 1/2", 5 1/2").
~ Turn CS over to back side and score at the 1" mark, and every inch thereafter. 
~ Fold on the score lines to make an accordion folded strip, creasing well.
~ Use strong adhesive to glue down both ends of the 1/2" tab of CS to the inside front (right side) & inside back (left side) of the cup cozy--make sure valley fold is on the inside of book, next to edge of covers when adhered.  Close "book" cozy so that the accordion pleats are stacked on top of one another.  Set aside for now.

~ To make your gift card envelope slots:  cut CS 4 1/4 square.  Place gift card diagonally in center of CS and fold all four sides around gift card (snug, but not tight).  Remove gift card, open up CS and on the left side only--where the creases meet, cut out the tiny triangles (shown  below marked in pencil). 
~ Fold the envelope together--bottom up, right side folded in, & top folded down.  Glue in place with strong adhesive.  The left side flap can be either tucked in after the gift card is inserted, or completely cut off for easy access.  This is the back-side of the envelope.  (I chose to glue my envelope completely together, including left side, then I used a circle punch to punch a half circle on the left side to make it a peek-a-boo slot to pull the card out.)
~ Open front cover of cozy "book" so that you can see first valley fold line at the 1/2" mark.  Determine if you'll start your book with a tag or gift card envelope (I began my Card Story Cozy with a tag).  If you're starting with a tag, skip the first valley fold by folding over the 1st accordion fold.  Run a length of strong adhesive on the right side edge only of the back of the gift card envelope. Turn gift card envelope over and press adhesive down into the valley fold of the accordion folded CS.  Turn the page & repeat for each of your gift card envelopes.  (The last 1/2" of your accordion folds is already adhered to the back cover--don't attach any envelopes to this section, or that page won't turn).
~ If you didn't start your book with a gift card envelope, then now adhere your tag or other embellishment to the first valley fold.
~ Glue decorative CS to the inside covers of the book--I left the corrugated boarder of the cover showing on mine, so my inside CS dimensions were approx. 3 3/4" x 2".
~ Finally, I used 24" of ribbon to wrap around my book -- run a line of adhesive horizontally centered on the back of the book cozy and attach the center of the ribbon.  That way your recipient can untie the book without losing the ribbon.
 Note:  My book was a real "page turner", but the pages were also able to fan out completely if desired.  If you'd rather your book's pages not fan out, you can apply this technique:  on the outside spine of the book where the accordion CS fans out, apply adhesive in each valley section--your pages will turn in true book form!
As always, if you have any questions, comments, or problems with this technique please leave me a comment and I'll respond quick as I can.

Valentine's Day, Birthdays, Anniversaries, "Just Because"...these Card Story Cozies can make any day fun!

Happy Crafting!  Lisa

Crafty Storage & A Snack too

My son likes beef sticks in his school lunches.  I found these snack sticks by Old Wisconsin that have the pre-wrapped meats in them.  What's really cool about them, is that they are in sturdy clear packaging without writing on them.  So you just remove the cardboard sleeve, and peel off the tape, and you have a little crafty storage container!  I love these--and almost always I can find internet coupons for the snacks.  I'd say that's a Win/Win!  I have a small shelf they fit perfectly on.  I like to leave the lids off for easy access, but I keep them underneath each container so I can seal them up and take them with me if I need to.  I'll eventually use my label maker to organize them even better--once I decide what I want in each one.  But I love the different sizes (different snacks), and they stack up great on my shelf. 
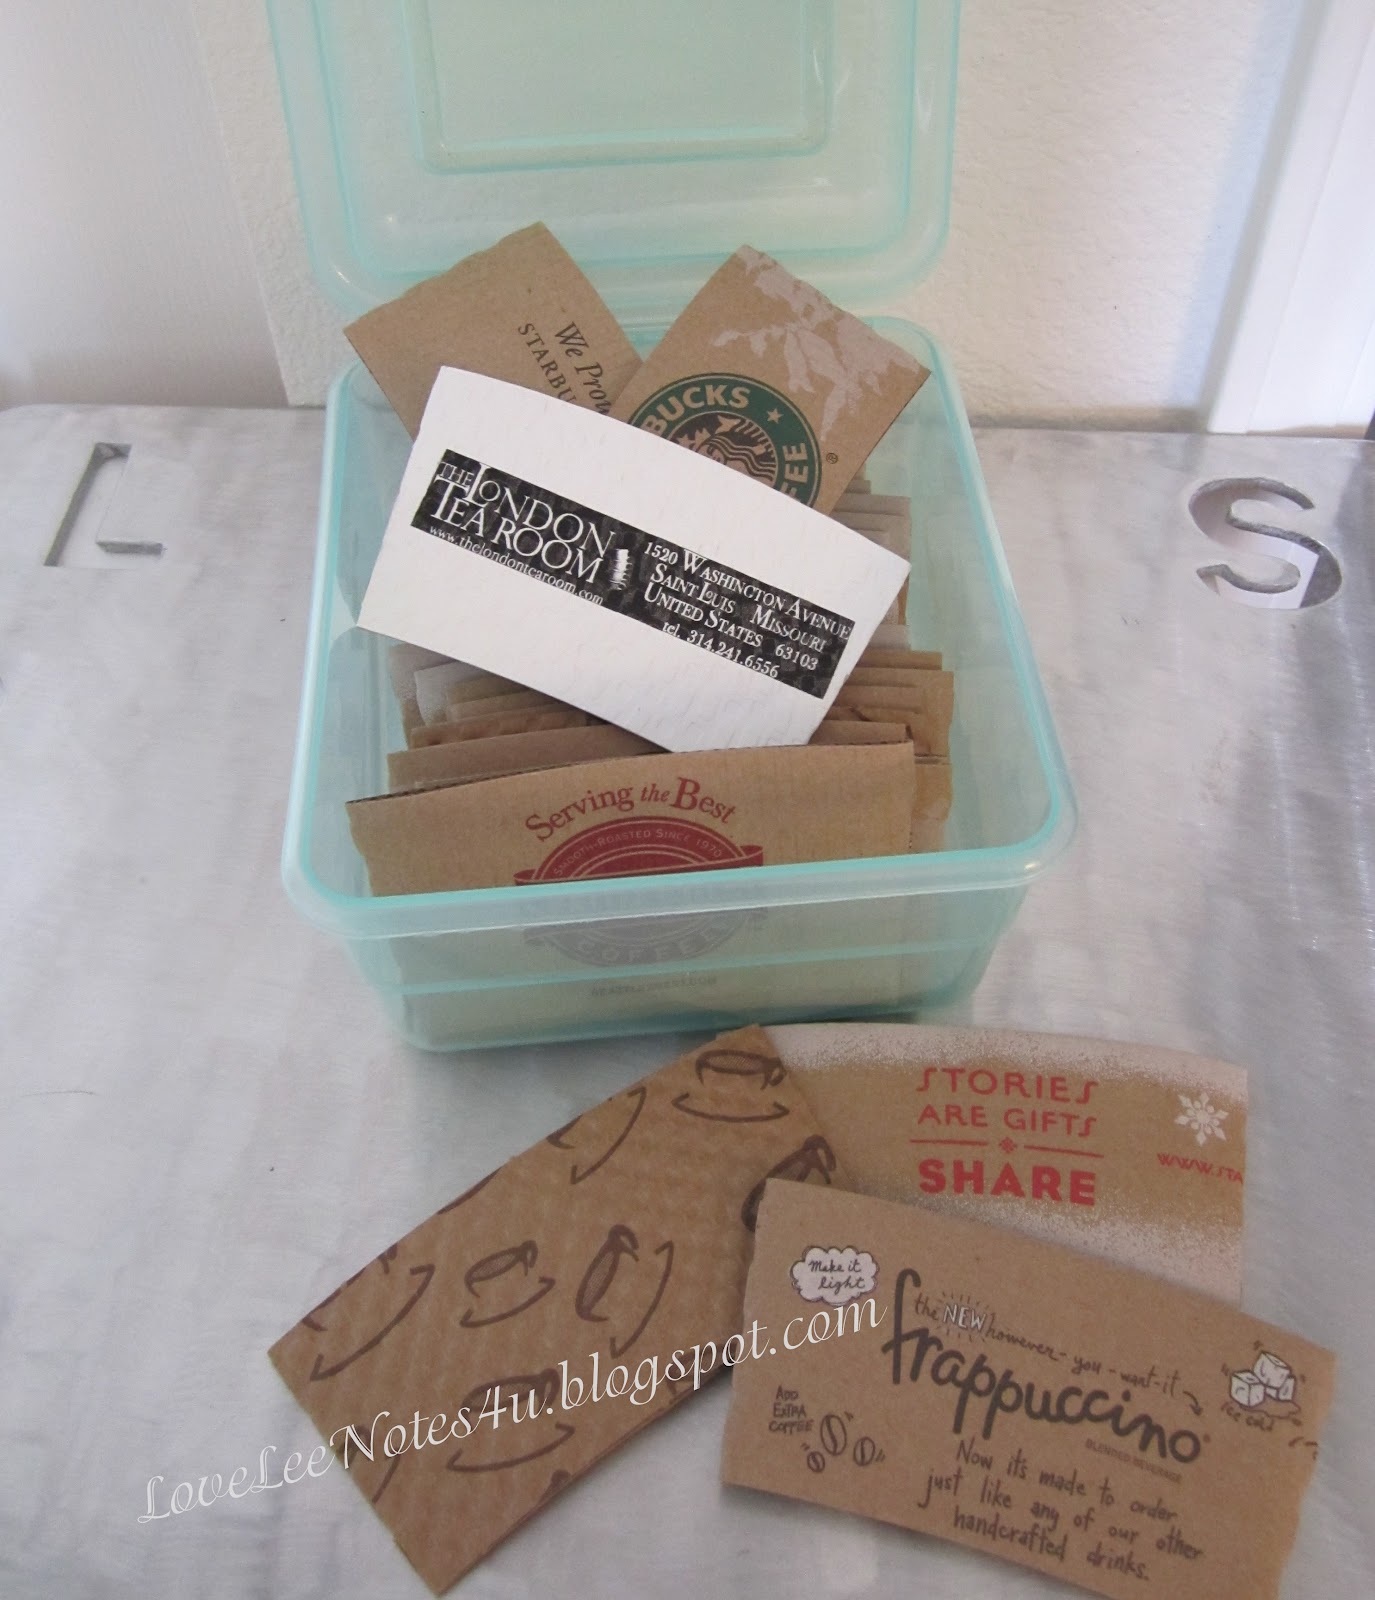


Just thought I'd pass on another of my favorite repurposed items. 

Thanks for stopping by,  Lisa

Wednesday, January 12, 2011

Off The Beaten Path w/Stained Glass


Happy New Year!  Guess I'm a bit late with that one, but I've definitely been keeping busy.  As with a lot of crafters, after Christmas I set about organizing & re-organizing my crafty spaces with all my new creative toys--it was fun to do, but took a bit of time.  But I've also been taking a few classes myself in an area outside of papercrafting, doing something I had previously decided I wouldn't persue -- working with Stained Glass.

My Dad was a self-taught stained glass artist.  He started out reading books, and going to glass art shops for supplies, & asking questions.  But his work was amazing!  He developed techniques that I wish I had the expertise of today.  I remember watching him work--he had developed his skill so quickly and he was so patient & precise.  I'm not even that patient when I paper-craft.  lol.  When I graduated High School I was really into unicorns, so Dad made me a beautiful unicorn stained glass hanging--it is by far my favorite gift of all those that he subsequently made for me...but I cherish them all.  Just after he passed away, a couple years ago, I was browsing at a bookstore and found a lovely book called Pretty Little Things, by Sally Jean Alexander.  The ideas were wonderful for smaller glass projects--vintage and gorgeous!  I saw a small glass chair and immediately I thought of the empty chair where my Dad once sat.  I was thinking that would make a great ornament project for Christmas using my Dad's glass.  Needless to say, I bought the book and decided it just might be something I could get interested in trying.

Fast forward to Christmas holidays 2009 -- one year after Dad's passing, almost to the day, I began my first stained glass class.  It was actually emotionally taxing at first, especially since Mom had given me some of Dad's tools to work with including one of his first soldering irons, and I was afraid I was too far out of my realm of comfort.  But my instructor, Jill Wicke, was awesome, and really did a great job with the class.  I had to take a break after the beginner class because her teaching schedules and mine collided.  But I resumed this year with the intermediate class, and I'm now I've almost completed the advanced class (not sure I'm all that advanced--but there ya go, it's progression). 

I did venture off a bit from my classes to make that glass chair -- the one that got me thinking about branching out.  It was a lot harder than I thought it would be, but as a beginner I am pretty pleased with the results.  I made one for Mom, G'ma, & myself at Christmas time, but I still have five other brothers/sister that I still need to make one for. 

Anyway, this is definitely off the beaten path for me -- but thought you might like to take a glance into something a bit different to start off 2011 with me.  My current project, a three dimensional lamp, will be completed in a couple weeks and I'll post a photo when it's completed. 

Next post -- back to papercrafting...and a bit of recycling too, of course.  =)

My 1st Stained Glass project - I used my Dad's glass in the four corners, two red diamonds, and center of flower.  I love how the textured glass makes it look somewhat like rain, all aimed in towards the flowers--despite the snow.

Butterfly Fan Lamp - all made with Dad's glass.  I love the copper patina.


Thanks for stopping by!  Lisa