 |
| ConGraDulations! |
I'm back today with some Graduation cards I've been working on. I used my Cricut Expression2 Anniversary edition (CE2) for these cards...which is important to note...since the cartridge for this particular type card is preloaded on the machine, and called "Just A Note". I also used the Wrap it Up cart.
The concept is fairly simple...which is basically cardstock folded into thirds...with the left side foldover cut off 1/3 way down, and the right side foldover cut off 2/3 way down for a tiered tri-fold card. However, using the CE2 to cut out the words and images did make it a lot easier -- except when you're making four of them in the various school colors. LOL. I'd have to say that took a bit more time, but I really like the way they turned out.
 |
 |
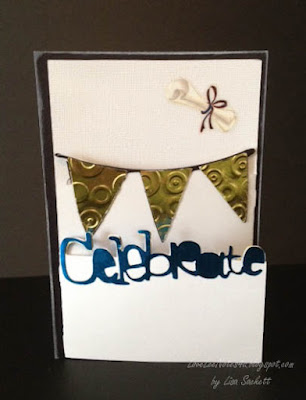
I actually made three, then had another grad announcement from a friend for her Bachelor's degree...so I made a fourth. The last one I made I used a German foil for the banners, celebrate, & tassel. It was a bit more delicate to cut, so I used a medium paper setting and cut it out at a slower speed. Speaking of the German foil, if you missed the post using it for faux Dresden, you can check it out HERE..
 |
All the banner cards were cut at 5 1/2" including the layered features (card & card layers). When cutting the banners for the inside feature I used the flip feature to mirror the image. The Graduate w/Hat phrase was cut from the Wrap it Up cartridge at 2 1/2", but for the tassel I used the layer feature and cut it at 2".
I added a colored mat backing to give the cards a bit more depth & color (they just seemed a bit plain). I inked the banners on three of the grad cards according to their school colors -- that way I could use white deco paper for all the banner cuts, yet have them match the cards individually. I also added a quote, and used stickles to "bling" up the cards just a bit. To finish these cards up, I rolled up a check ($$) and tied it with hemp cord 4-5x then adhered it to the card (diploma style) by using 1/4" score tape on the back layer of hemp cording. I ran distress markers over the bows for additional color. The diploma (check) can easily be removed by pulling it out of the cording.
 |
For the foiled card -- the foil was a bit delicate to cut for the wording and had to be pieced in some areas, but on the whole it turned out great. Because it's quite a thin foil I didn't even have to pull out my Cuttlebug to emboss the banner pieces. I just set them inside the Spots & Dots embossing folder and pressed with my fingers -- can't get easier than that. =) I added a sticker diploma that had red in the ribbon, so I used a Sakura Glaze pen in blue to change out the color. I left a slight shadow of the red on the edges for the look of dimension. Finally, I used photo corners to hold in a gift card...adding a quote just behind it to show once it is removed.
 |
 |
Congratulations to all the graduates this year...You Did It!! Lisa


Lisa, you left me the most delightful comment on my blog and I wanted to thank you so much -- you made my day!! I sat down with my coffee to browse and wanted you to know that I love your mixed media style!! Thanks again!!
ReplyDeleteWhat an awesome card Lisa! TY for your help!
ReplyDelete