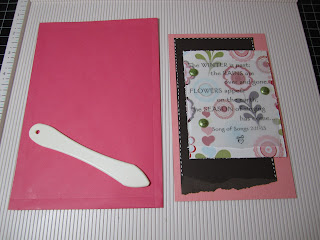
Take the envelope you want to use and center your card on the front (do not adhere). Leaving approximately 1/8" around the perimeter of the card score the envelope on all four sides.
 NOTE: Use a score board for easy scoring; but if don't have a score board you can use your paper trimmer (move the blade down & out of the way) and use a stylus to score in the grooved area of the trimmer. If you don't have a stylus, you can use a ballpoint pen w/the ink removed).
After scoring your envelope, set aside your card.
Cut out the notches from the corners nearest the envelope flap (this will help the card to fit inside easily and the envelope to lay flat).

UPDATE: You can cut the corners off the bottom of the envelope to the score line -- this will help eliminate some bulk as you press the folds into the envelope to flatten it out to the new size.
 |
If you have a flat card and don't need the extra bulk of the envelope for dimensional elements, then use a glue stick to seal the scored edges together around the perimeter of the envelope. For the scored part on top of the envelope flap at the folded hinge, you'll want to adhere that section together regardless of whether you are inserting a dimensional card or not.
If you have dimensional brads, or other items that make your card bumpy, you can add a cardstock protector for the front of your card to protect your embellishments during the postage process. And by the way, using a piece of cardstock to cover your embellishments on your card helps to cut the cost of postage, as the postmaster has the authority to charge extra if he/she can feel embellishments through the envelope.
I got a Bunch of envelopes free at a garage sale a while back, but instead of making a card to fit my envelope I would usually make the card first, then hope I have an envelope that fits. This has made it so much easier to choose the envelope I want, and modify it to fit most any card.
**You can right click on any image (open in new tab) to enlarge the picture for close-up detail.**
Thank you for stopping by! Lisa


This is so cool. Thanks for sharing. FYI your comment on my blog came thru ok with your name. Ill be sending you some flowers for rosettes later this week. Ill probably add a few more little bits too. take care, gerri
ReplyDelete