Monday, January 30, 2012

We Have a Winner!


And the winner, of the UGlu Dashes, is...

Pat Behnken! 

Pat, send me an email with your mailing address and I'll get your prize out pronto -- and a bit o' somethin' extra. And remember, I'll need to hear from you within 48 hours or I'll need to draw another name.


Thank you all for your kind comments -- both via email & on my blog post.  I appreciate each & every one!

Later this week I'll be back with a repurposed project -- something I made with a finished box of dishwasher detergent. 

Until then...have a great week!  Lisa

Tuesday, January 24, 2012

Framed with a Pocket Watch


A former pastor of mine, and his wife, asked me to bring a vintage touch to their dear friends' 60th Wedding Annversary Invitation.  He brought me a frame and the photo wedding invite, and said he was looking for something simple, with a touch of lace.  Sixty Years -- Wow! Isn't that so wonderful?! And aren't they a gorgeous couple.

Instead of trying to find a mat for the photo card, I found this great tattered lace cardstock that I used for the background.  To give it a mat "look", I added a swirl ribbon pearled border around the photo.  It added a bit of dimension to the layout as well.  But once I put the glass in place, I just couldn't quite get the frame to close in place.  So I took it to a local frame shop and they added new framing darts in back to hold it in place.  They so loved the idea of this couple's 60th Anniversary that they did not charge me, I thought that was very nice.  I finished the frame off with some pearl & lace accents from Prima, and a clear sticker that reads "Eternal Love" on the lower left hand of the glass.

I wanted this frame to be an extra special keepsake, so I added a Tim Holtz Pocket Watch that I embellished. 


I found out that he used to own a car/body shop for years, that they've lived in Illinois all their life, were devout Christians, they treasure their memories, and are still deeply in love.  So, for the background I punched a 1 3/4" circle* from CS to fit into the watch frame and added a metal embellishment that said "Faith", a TH license plate sticker for Illinois, a red wooden heart button, black letters for their initials, TH filmstrip ribbon, and some tiny Swarvorski crystals.  I glued everything in place, except the crystals.  When I sealed the pocketwatch back together I added a clear "love" sticker to the front glass casing.  Finished it off with vintage lace tied off, and an embossed charm "cherished memories" (by Making Memories).

*NOTE:  for the background circle punch I used EK Paper Shapers 1 3/4" Circle Punch PSPWP01.  As you press the cardstock in snugly, it fits perfectly!

I wanted to add the pocketwatch to the frame, but I also wanted to make it accessible to be looked at.  So I used two of TH metal photo corners, and attached them to the lower right hand corner of the frame with UGlu Tape Dashes to make a pocket to hold the watch. 

Omigoodness...this is such an awesome adhesive!  It's made by the same company that makes the MacBond that I bought for my husband's toolbox (post found HERE), and that I used to fix my blending tool (post found HERE), but great for crafters -- non-toxic & acid-free.  It's permanent, but can easily be removed...sort of an oxymoron, but it works.  I did try using Glossy Accents to adhere the metal to the frame, but it just didn't hold up to the weight of the pocket watch. 

As a matter of fact, I have a package of UGlu Dashes to give away -- just leave a comment on this post by Sunday, Jan. 29, 2012 midnight U.S. Central Time Zone, and I'll post a random winner on Jan 30, 2012 -- the winner will have 48 hours from the time I post their name to contact me or I'll have to draw another winner.  There just might be a little something extra in the package as well.  just sayin'...

Hope your day is simply beautiful today!  Lisa

Thursday, January 12, 2012

Packaged Organizer

Today I'm going to show you a fast (and easy) organizer booklet I made for my Tim Holtz Bigz & Sizzix Dies using it's own packaging!  You could also use this same concept for a variety of other ideas including other organizers, books, etc. 

I came up with this idea because I was keeping my large dies in their original plastic packaging, and every time I pulled the foam padded dies out of the plastic I would seem to get a static shock (it's been kinda dry here--other than today when it started snowing).  =) 

So I pulled the paper packaging out of the boxes and was clipping them together, thinking about making them into a small booklet, but the sizes were all so different.  As I was cutting up the plastic to repurpose for other projects...that's when the lightbulb came on!  I had just picked up a set of Tim Holtz' small Ring Binders and I discovered that they fit perfectly into the side panel of the plastic packaging. 

I simply took the plastic box for the largest die I had and cut around three edges -- leaving the left side intact for the ring binder.  Then I put it on my paper trimmer to trim the cut sides neater.  My plastic cover ends up measuring 6 1/4" high x 6" wide.  I used a 1/8" corner rounder to trim off the sharp corners of the plastic.

I also cut my product sheets to 6" high x 5 1/2" wide.  The larger Bigz dies needed trimmed to fit width-wise, and I folded the bottom edge behind so the front panel measured 6" x 5 1/2".  The decorative strip dies were folded in half and I cut off paper that extended further. 

I attached the ring binder by marking the holes first, then cut the holes using a small hole punch, and attached the ring binder with the included brads. 

I used the bottom strip from the paper packaging to attach to the outside of the spine -- this helps to hold the brads in place, and adds a place for you to title your organizer, as well as a decorative element. 

NOTE: before attaching the ring binder, you might want to add decorative paper to the inside of the spine as well to help hide the brads since the packaging is clear acetate.

For the tabs, (cut w/Tim Holtz' File Tabs - On The Edge die), I just used scrap paper (TH Vintage Shabby) cut 1/4" larger in length than my product pages, and labeled with my white Signo gel pen & outlined with a fine point black sharpie. 

I've also posted a short YouTube video showing a bit more about this newest organizing booklet for my Sizzix Dies.  You can click HERE to view the five minute video in a different window. 

Well, that's it!  Think of all the possibilities... =)
Thanks for stopping by.  Hope you're keeping cozy!  Lisa

Friday, January 6, 2012

An Elegant Thank You


I hope everyone's Christmas & New Year's Eve/Day was lovely.  It was a quiet one at our house, but just as enjoyable.  My hubby & son, Cody, indulged me with some more wonderful crafting supplies, among other things, and my oldest son, Nathan was able to come out for a quick Christmas visit too, bringing me a cast iron teapot.  The best part of the season was getting to spend some family time together -- all of us!

It's been a while since I've been able to post, but I finally created a bit of space on my desk for a few projects I wanted to work on.  I'm working on another video to share soon, but in the meantime I thought I'd share a few elegant, wintry Thank You cards. 

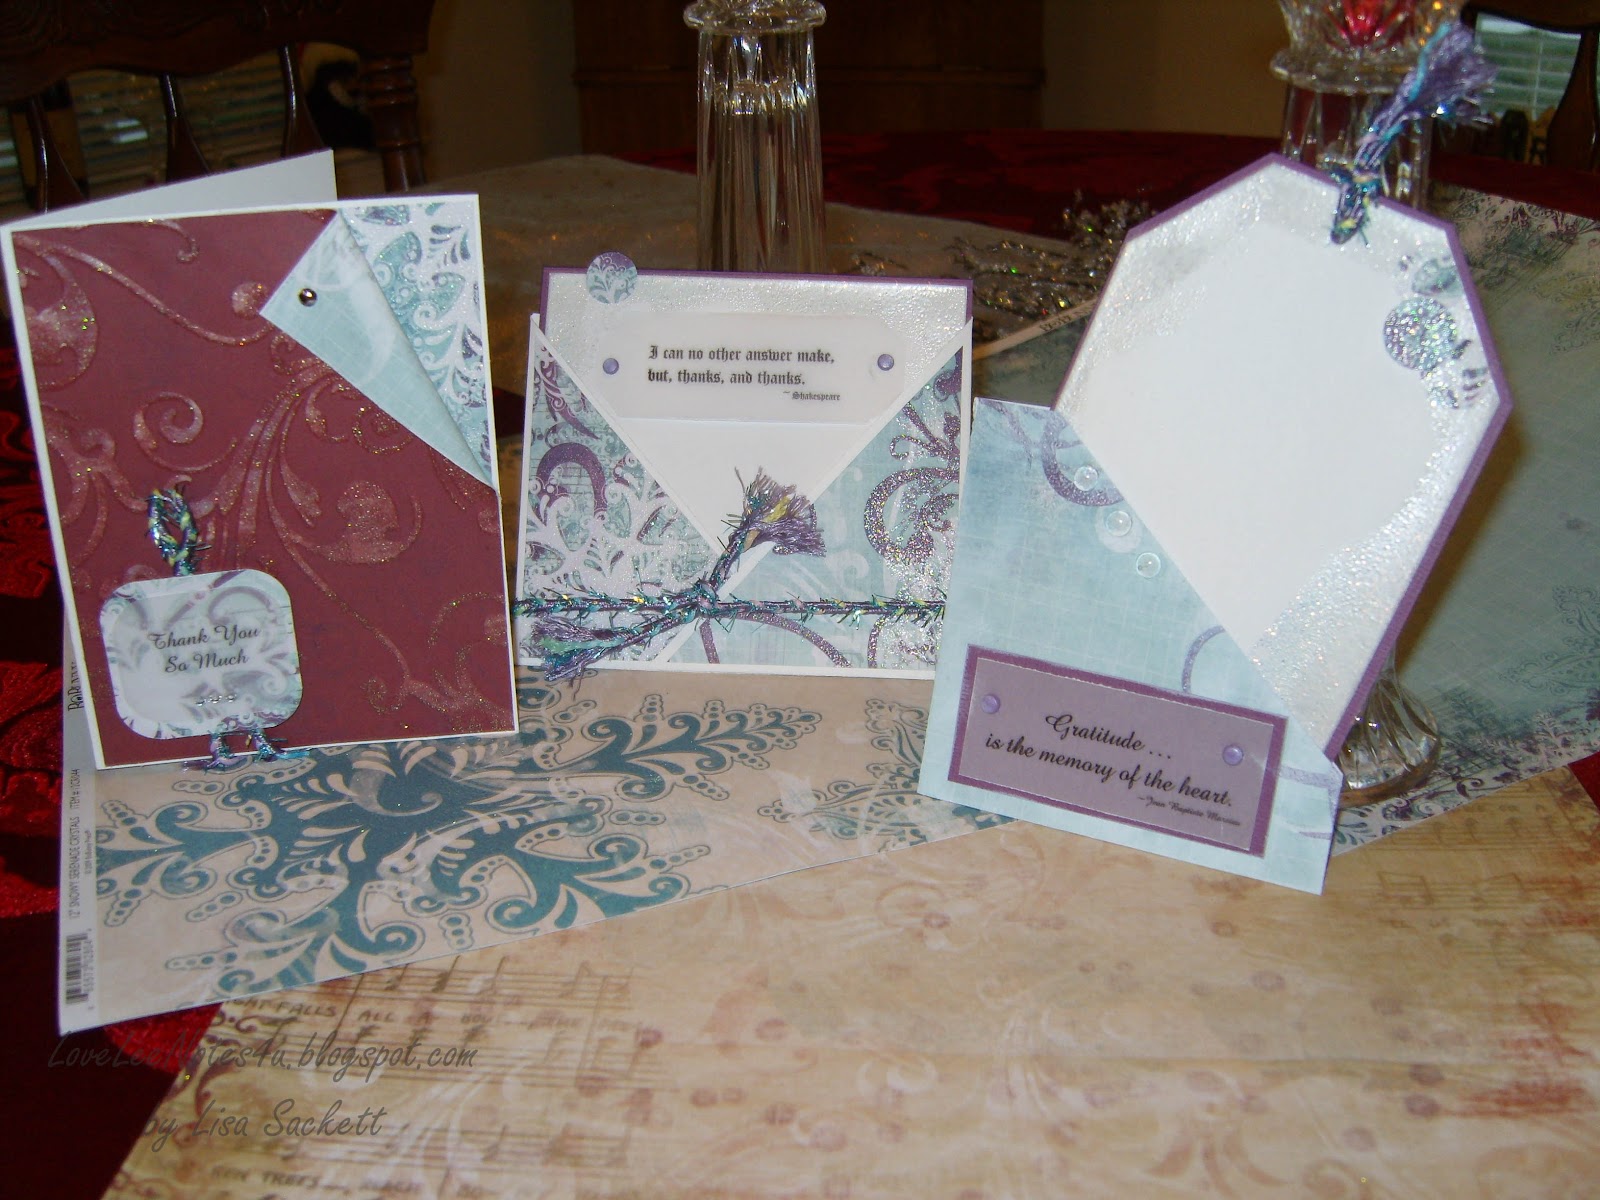
I had some glittery, embossed cardstock (CS) scraps (Bo Bunny) that I wanted to be able to put to use after the holidays, and thank you cards were the perfect excuse.  I used white CS as my base, and for the wording I printed onto vellum, attaching it the cards with brads.  I found some great May Arts cording that went with the color scheme and made some simple cards.

For the "Thank You So Much" card, I added a small corner CS scrap to the upper right hand edge and then folded the CS over to reveal it, attaching with a brad.  I'm thinking a snowflake brad might've been a nice touch (if I had thought about it at the time).


The Criss-Cross card is another great way to use scraps.  I used a white CS base 12" x 4", scored at 3 1/2" & 8 1/2", then on each scored side I cut from the top of the score line to the bottom opposite corner - to create the triangle and folded on the score lines to criss-cross the card.  I added deco CS triangles to the front, leaving 1/8" and ran a line of glue on the bottom edge to hold in place.  The cording was tied around for a decorative element. 

The insert card is 4 7/8" x 3 1/2" with a slightly smaller white CS adhered to it.  I ran a Versamark pad around the edges of the CS and heat embossed Bridal embossing powder around the edges.  After it cooled I ran the Versamark pad around the edges again and this time heated embossed with clear embossing powder, which helped set the glittery bridal powder a bit better and gave it that glossed "wintry" effect. 


When I was going through my scraps I found this folded piece of CS that looked like it could've been a pocket, so I added a line of adhesive to the bottom and side to "make it so".  I made the tag using the same techniques as the insert card, and finished the tag card with three clear baubles/dew drops. 
TIP:  This is a good time to use up some of your Christmas cardstock -- if it's double sided paper, there's a good chance there's a great alternate print on the back for some easy cards, whether they be thank you, thinking of you, or even a seasonal birthday.

My favorite element is definitely the random melted embossing powders around the edges.  Sort of reminds me of melted icicles.  But of course the weather we're having today is in the 60's...so for now, this is as close as I'll get.  I'm sure winter will make a snowy showing anytime now...

Best wishes for a lovely weekend!  Lisa